Five Tips for High School STEM Camps
We all want students to dive into real projects that tie together science, technology, engineering and math (STEM) in ways that inspire them to innovate, create and problem-solve. Yet, the need to cover the required curriculum, and limits on time, resources and training, complicate the task of creating an in-school STEM program, to say the least.
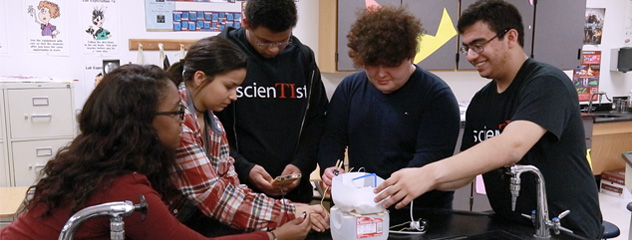
This year, a team from Texas Instruments set out to find ways to excite students about math and science by giving them a meaningful experience in solving a real-world STEM problem. We launched an after-school club in which students could get hands-on experience in coding and engineering design using the new TI-Innovator™ Hub with TI LaunchPad™ Board. Working with faculty and students from the University of Texas at Dallas, we developed a six-week after-school STEM program for students at Webb Middle School and Sachse High School in Garland (Texas) ISD.
Admittedly, we had a lot to learn. Here are five tips we learned for conducting a successful STEM camp.
Tip 1: Find a compelling problem to solve. Students love to ask, “When are we going to use this?” Our challenge was not to give them something to learn, but a reason to learn it. To kick off the project, we shared a story about the heavy toll a drought has taken on a farming community in Zimbabwe. Then we gave the students a problem: How can people living in this community with no running water design a system to irrigate plants efficiently and effectively? The newspaper article was our “hook” – the real-world problem, the reason – to compel students to find a solution. It also offered some background information, context and design constraints as they tackled the project.
Tip 2: Involve others from your school. Did you know that the math teacher down the hall used to be an engineer? Or that the history teacher taught herself how to code? Getting others from your school involved not only adds different sets of expertise, it also helps build a sense of community around the project. We found that some teachers were comfortable providing organization and direction to the students, while others really wanted to “get their hands dirty” working with the technology. Had we limited the program to only the science department, we may have missed out on the added skills brought to the table by other teachers and staff.
Tip 3: Get kids doing hands-on right away, then teach the science concepts. It seems like you should teach concepts first, then have students apply their knowledge to a problem. In this case, we found that giving students small design “wins” early in the project helped get them engaged at the very beginning. We had the students write their first programs to begin the project. This helped plant the idea that they would write programs to control the irrigation system. Writing these introductory programs led students to ask more questions about how to control their system, which inputs might make sense, and how to know if the system was reading the output. Once they started asking questions about the overall system, we dug into the science and design of the system: abiotic versus biotic factors in the system; constraints of sensors and pumps; and how to write programs that could connect to temperature, humidity, soil moisture and light sensors, read them and make decisions based on data collected by them.
Tip 4: Plan for students to move at different paces. You may need to provide additional support to students who fall behind or additional challenges to those who complete their work ahead of others. Think about ways to make the project more challenging by changing the parameters or by asking for refinement of the design.
One challenge we ran into was students missing sessions due to other after-school commitments. As in many STEM projects, the concepts and steps taken in each session depend on those covered in previous sessions. So build time into the beginning of each session to get students who fall behind up to speed while others do advanced explorations on their own.
Try to anticipate sessions that might be more complex so you and the students can plan accordingly. In our case, the in-depth discussion of the science-design challenge required all students to be present. With some preparation and advance notice, we got everyone there to participate in the most valuable part of the project.
Tip 5: Share your work. Recognizing students’ dedication to their STEM project can encourage others to take part. Showing parents and administrators the completed projects is a no-brainer! Administrators will be eager to share the students’ success with the school and in the community. Garland ISD administrators were so excited by their students’ projects that that they called the local NBC affiliate. This caught the attention of students and teachers in nearby schools and prompted them to ask when the STEM club would visit their campuses.
Beyond sharing your students’ work in your community, think about ways to encourage other teachers and give them ideas for bringing STEM into their schools. Presenting at a local conference is a great way to show off your project and build connections with like-minded teachers. Documenting the project on a blog or social media is an easy way to share it widely with others.
If you would like to try the Drought in Africa: Smart Irrigation Project that the students in Garland ISD completed in our after-school program, download the Set Up Guide and Project Manual (all sessions now available) here.
Tagcloud
Archive
- 2026
- 2025
- 2024
- 2023
- 2022
-
2021
- January (1)
- February (2)
- March (5)
-
April (6)
- Top Tips for Tackling the SAT® with the TI-84 Plus CE
- Monday Night Calculus With Steve Kokoska and Tom Dick
- Which TI Calculator for the SAT® and Why?
- Top Tips From a Math Teacher for Taking the Online AP® Exam
- Celebrate National Robotics Week With Supervised Teardowns
- AP® Statistics: 6 Math Functions You Must Know for the TI-84 Plus
- May (1)
- June (3)
- July (2)
- August (5)
- September (2)
-
October (4)
- Transformation Graphing — the Families of Functions Modular Video Series to the Rescue!
- Top 3 Halloween-Themed Classroom Activities
- In Honor of National Chemistry Week, 5 “Organic” Ways to Incorporate TI Technology Into Chemistry Class
- 5 Spook-tacular Ways to Bring the Halloween “Spirits” Into Your Classroom
- November (4)
- December (1)
- 2020
- 2019
-
2018
- January (1)
- February (5)
- March (4)
- April (5)
- May (4)
- June (4)
- July (4)
- August (4)
- September (5)
- October (8)
-
November (8)
- Testing Tips: Using Calculators on Class Assessments
- Girls in STEM: A Personal Perspective
- 5 Teachers You Should Be Following on Instagram Right Now
- Meet TI Teacher of the Month: Katie England
- End-of-Marking Period Feedback Is a Two-Way Street
- #NCTMregionals Kansas City 2018 Recap
- Slope: It Shouldn’t Just Be a Formula
- Hit a high note exploring the math behind music
- December (5)
- 2017
- 2016
- 2015