Aha! Activity: Get Students Excited About Linear Equations
Posted 09/19/2023 by Brad Posnanski, @POSitive_MATH


|
Brad Posnanski is a T³™ National Instructor and teaches algebra I, precalculus and computer science at Comsewogue High School in Port Jefferson Station, New York. He loves to create and do hands-on projects with his students. |
Learn through playing — build a slide whistle to examine linear equations
Play … create … try something different! If you do that, you will sometimes stumble into/ onto something that you can use to engage your students in a more meaningful way. That is exactly how this activity was born. It began with playing with a distance sensor and seeing the distance measured. The next thought was “big deal — what is so special about this?” How can we use this distance to control or change something else? Then it occurred to me that the TI-Innovator™ Hub could make sound frequencies, and that was where it all began. The challenge was how to use the distance to control the frequency.
“Part of the project will wear you out a little … the upside is the students absolutely love it!”
Instead of starting your lesson on writing a linear equation or finding the slope of a line, create an itch that needs to be scratched! Use the two points in this activity to drive the need to use the slope formula and thus create a linear equation that has context.
Applying some basic code (no coding experience needed) and recording some measurements, students will be able to create two points that relate distance to frequency. However, to play every “note” between will require some “function” and that is where the math comes in. Let’s take a look at the details on this activity.
Blog overview
The activity is organized in five sections (sections 2–4 do not have to be done in that order):
- Activity objectives, materials and notes
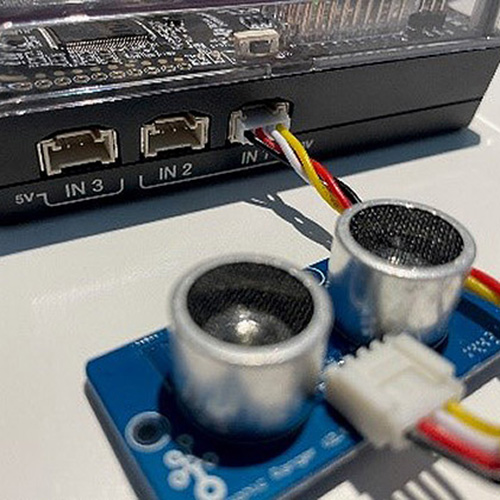
- Coding the Ultrasonic Ranger Module (device that measures distance)
- Coding the sound (there is a speaker on the TI-Innovator™ Hub)
- Building the slide whistle
- Calibrating the slide whistle
My algebra I students don’t know much about coding which is a great reason to expose them to it and get them more comfortable coding. When I used TI’s “Build a STEM Slide Whistle” activity, it was easy to modify existing code for students to create a working slide whistle that is controlled with a linear equation! The directions are simple to follow and the images illustrate what students must do.
See a student in action with this project (from @POSitive_MATH):
This student absolutely L♥️VED making and playing his #STEM Slide Whistle. Student made with @TICalculators and the #Innovator turning a sonic measured distance into a frequency. #Coding in #python during #CSEdWeek2022 pic.twitter.com/TyOtQj8hjk
— Mr. Posnanski (@POSitive_MATH) December 9, 2022

1. Activity objectives, materials and notes
|
Build a STEM Slide Whistle
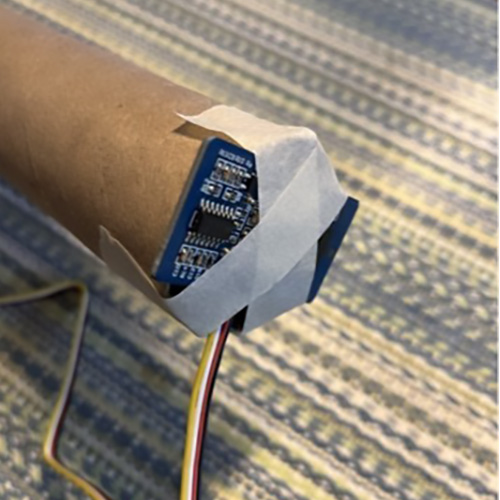
Lesson objective: Use sensor input to control output and create a relationship between distance and frequency through a linear equation. Subject: Algebra I Duration: Two class periods Equipment and materials: • 3 TI-Nspire™ CX II teacher kits (10 calculators/1 docking station per kit) • 10 TI-Innovator™ Hubs (one per three students) • 10 Ultrasonic Ranger Modules (one per three students) • 10 paper towel tubes • 10 scissors • 10 popsicle sticks • Masking tape or hot glue • Hole puncher • Cardstock or manila folder • Circle sheet (in teacher activity guide PDF) Note: To save time, you can divide this into smaller segments and/or prep the cardboard tube and slide at the end or beginning of a period, and then use another entire period to explore the sensor and play with the sounds. |
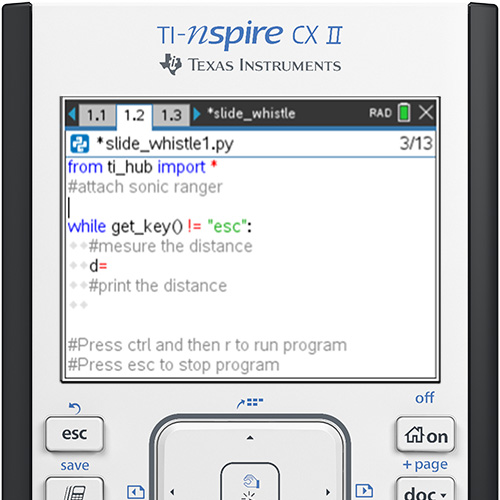
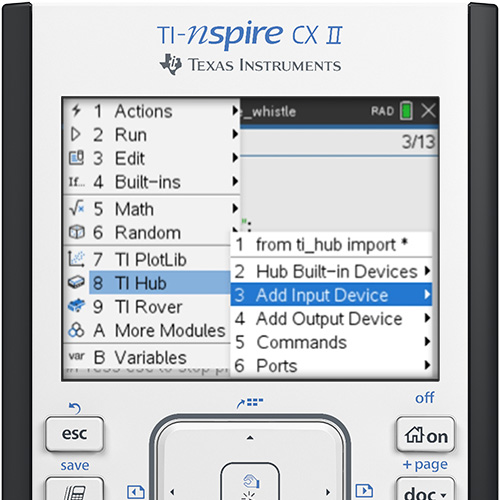
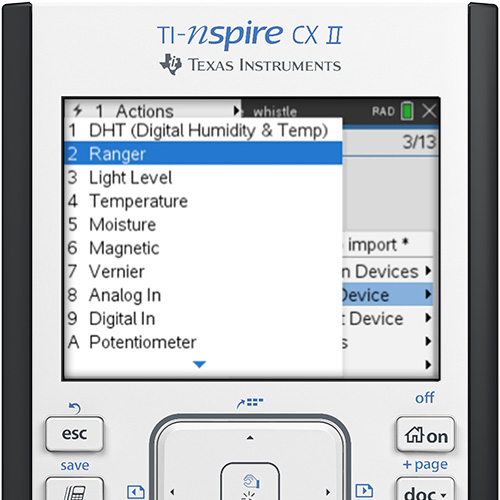
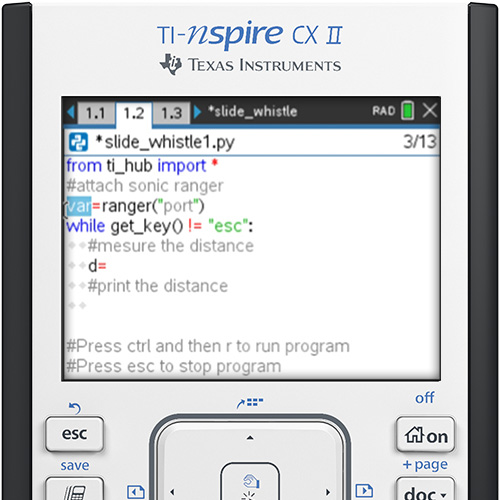
2. Coding the Ultrasonic Ranger Module
To code the Ultrasonic Ranger Module, students will follow step-by-step instructions on how to modify an existing Python program to actually measure distance. The screenshots below are a sample of the sequence of steps students would follow to modify the program.
3. Coding the sound
To code the sound, students will modify an existing program where they try out different frequencies and durations. This part of the project will wear you out a little with all of the noise. But the upside is the students absolutely love it! The activity includes a piano reference so students might have a better idea of how the notes match the frequencies. It also has step-by-step screenshots with keypresses on how to change the code to meet the requirement.
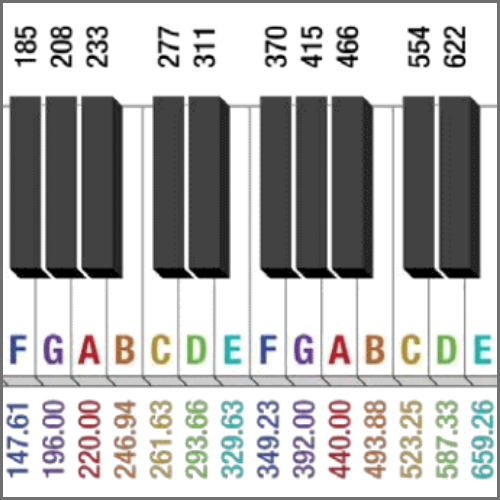
Frequencies are listed below the white keys and above the black keys in Hertz (Hz). For example, A0 is equal to 27.5Hz, while A4 is equal to 440Hz. Notes start from A0 and go to C8 from left to right. Notice that as you move from left to right, each frequency for a note roughly doubles, for example, B0 = 30.50Hz, B1 = 61.74Hz and B2 = 123.74Hz.
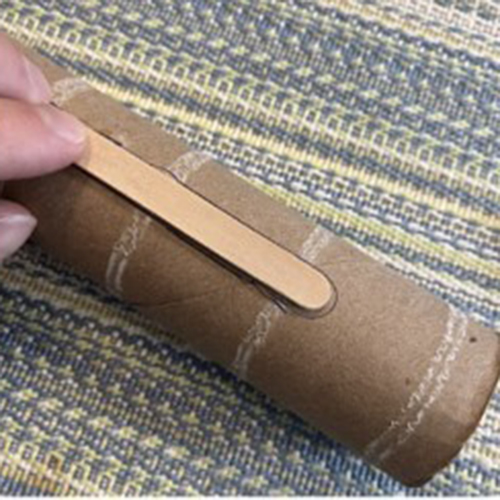
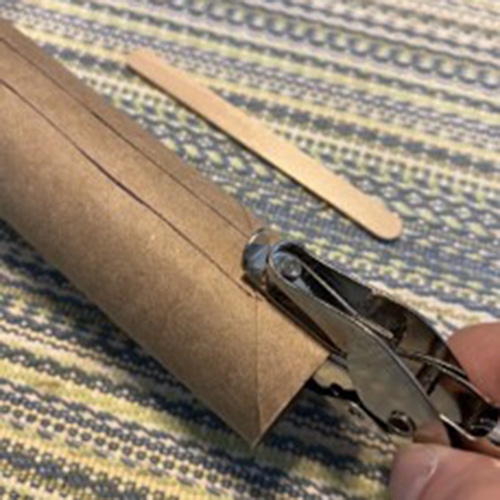
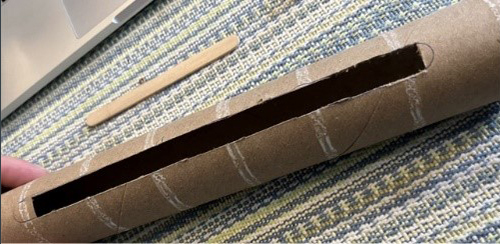
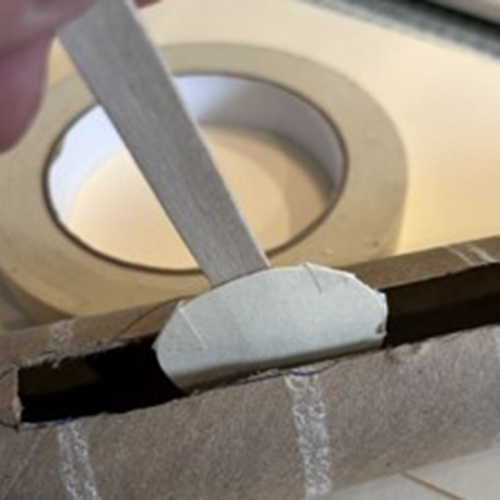
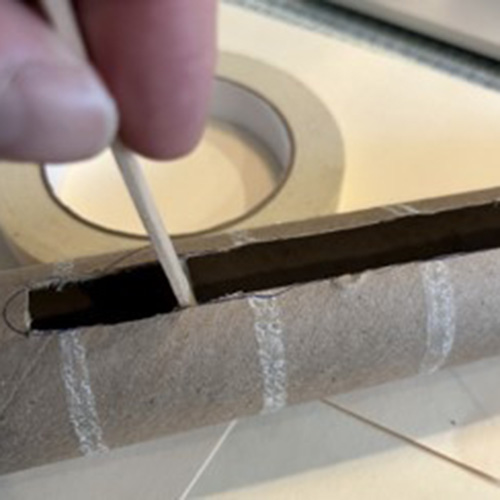
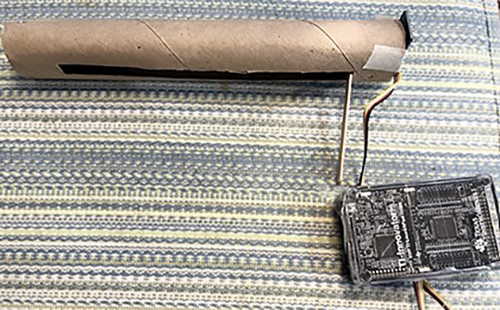
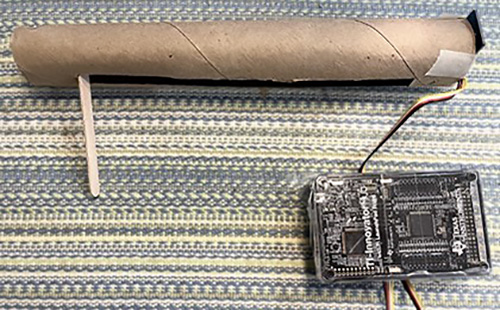
4. Building the slide whistle
In this section, students will actually construct the slide whistle. Using a paper towel tube, popsicle stick, hole puncher, scissors and cardstock (or equivalent), they will create a system that allows them to freely move a disk that changes the distance the ranger senses. The change in distance will correspond to a change in frequency.
5. Calibrating the slide whistle
Now that students have constructed the slide whistle, they are ready to try it out!
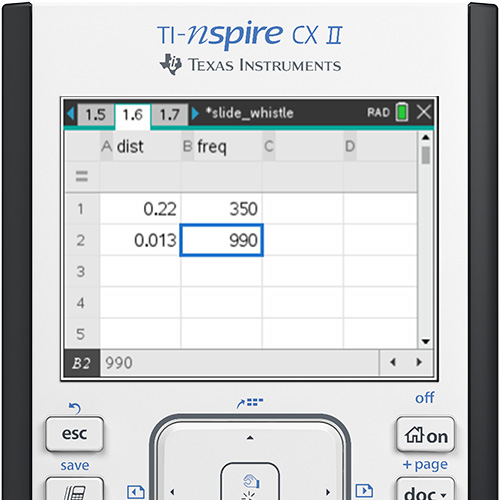
Next, they’ll plot the two points on a data and stats page and then assign a linear regression (mx + b). Students can also use the two points to calculate the slope and y-intercept, then confirm their equation by using the linear regression.
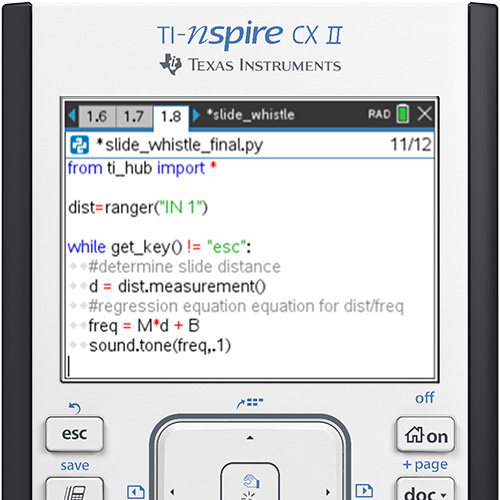
Now they will play their slide whistle by running the program on page (or tab) 1.8 of your TI-Nspire™ CX II graphing calculator. Notice the variables they created in the table are present (“dist” and “freq”). The line “freq=M*d + B” means that the frequency they hear is the slope of their linear equation x the distance of their slide + the y-intercept of their equation.
Another student’s slide whistle in action (@POSitive_MATH):
More #STEM slide whistle celebrating #CSEdWeek2022. @TICalculators for the win! pic.twitter.com/VKRjJYaMkH
— Mr. Posnanski (@POSitive_MATH) December 9, 2022
What’s next?
Learn through experimenting! With the “Build a STEM Slide Whistle” activity/project, you have the chance to have students build their musical instrument and teach them an application of linear functions. What other math concepts could you teach students using the slide whistle? Were there any comments or ideas that came from your students while coding TI technology that could make for another fun, hands-on lesson? Taking a different approach to teaching a concept gives students a chance to apply those ideas in a real-world setting.
| Download the “Build a STEM Slide Whistle” activity files for the TI-Nspire™ CX II graphing calculator (includes .tns file, teacher and student guides). |
|
Related activities
10 Minutes of Code (for TI-Nspire™ CX technology) |
|
Borrow TI equipment
TI has a great program where you can borrow TI equipment, at no charge, for up to two weeks to try this project before you decide to purchase. Visit TIstemProjects.com to make a request. |