Simple and Easy Calculator Tips for Algebra 2 Concepts
Posted 10/02/2024 by James Allen (@mrallenmath)

|
About the author: For 12 years, James Allen has taught at Huntley High School in the northwest suburbs of Chicago, Illinois. He has taught Algebra 1 through honors Precalculus, and a unique course called ‘Geometry in Construction’ where students use math to build campus structures. |

Algebra 2 introduces all sorts of fun new concepts and functions — logarithms, imaginary numbers and advanced trigonometry, to name a few. When taking this next step in mathematics, it’s important for students to upgrade their calculator skills for this new course.
Even with 12 years of teaching experience, I’m still learning new ways to use my TI-84 Plus CE graphing calculator — not just for calculations but also as a teaching tool. Recently, I discovered the transformation app, which was an absolute game-changer in my classroom as we began to explore new functions (more on that later!).
I’ve found that the best time to introduce calculator tips to students is in the moment, when they’re most relevant. That’s when I get the best student retention. (Side note: You may need to revisit some Algebra 1 calculator functions for students with rusty memories.)
There’s always more to learn with this calculator, so let’s get started!
- Degree vs. Radian Mode
- Find a Logarithm With Any Base
- Using Y-Vars
- Natural Log and e
- Imaginary Numbers
- Transformation App
1. Degree vs. Radian Mode
Your Algebra 2 class just started “getting’ triggy with it,” only to have half the kids say, “Wait, I got a different answer!”
Instead of immediately asking, “Did you type it in correctly?” I say, “Time to check our mode!”
Degrees and radians each have their place in mathematics. When I start teaching trigonometry in degrees, many students ask, “Why is there even a radian mode?” I keep my response simple: “Radians are a different unit of measurement. In fact, all calculus is done in radians, so you’ll be using them soon!” Then, we move on.
How to put the TI-84 Plus CE into degree or radian mode:
- Press [mode].
- Arrow down to the RADIAN and DEGREE options (row 4).
- Select the desired setting and press [enter].
If students were in the middle of a calculation, they can quickly return to the home screen by pressing [2nd], [mode] (quit). Then, press [enter], and the calculator will recalculate the previous answer in the new mode — no need to retype everything!
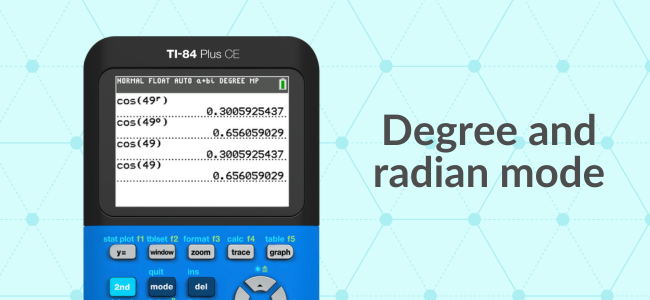
Bonus tip: You can be in either mode and still calculate in degrees or radians. For example, if I’m in radian mode but want to calculate the cosine of 49 degrees, I don’t have to switch modes! This is helpful when most of your calculations are in one mode but you have a few in another.
How to calculate degrees or radians without switching modes:
- On a home screen, input your equation.
- Press [2nd].
- Press [apps] (angle).
- Choose 1: ° to indicate degrees.
- Choose 3: r to indicate radians.
- Press [)] to close the parentheses

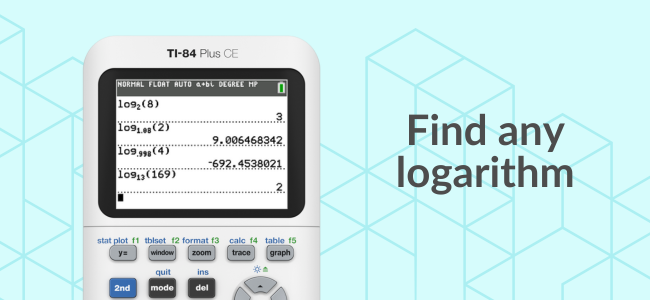
2. Find a Logarithm With Any Base
I love showing students how to calculate any logarithm with an application. For example, we might want to determine how long it will take for a $5,000 investment to double. After some algebra, we end up with a logarithm on one side of the equation — one whose base probably isn’t 10. We have two options: we can use the change-of-base formula, like they did in the old days, or…
How to find a logarithm with any base:
- Press [math].
- Arrow down to option A: logBASE(.
Bonus tip: There’s another way to access this template using “soft keys.” Notice the green f1, f2, f3, f4, and f5 labels above the top row of buttons? Press [alpha] and one of the f1– f5 keys to access these soft keys (I like to call them shortcuts). There are lots of other cool functions in these menus to explore!
How to find a logarithm with any base using soft keys:
- Press [alpha].
- Press [window] (f2).
- Select option 5: logBASE(.
This gives you the option for logarithm with any base, but take a look at those other functions because they may come in handy one day!
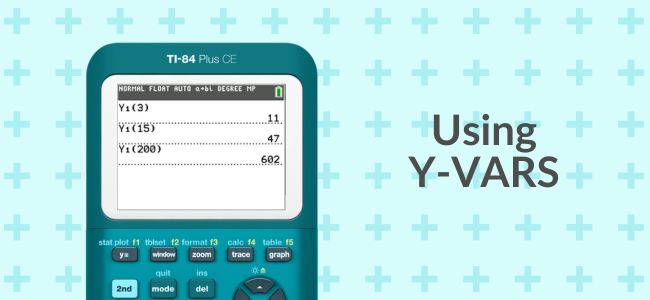
3. Using Y-VARS to Evaluate a Function
One of my favorite “hacks” I use in my Algebra 2 classes is using Y-VARS to evaluate a function at a particular value.
If you’ve typed an equation into y=, you can compute the value of the function at a specific x-value.
This is super helpful when working with regression equations. If you store your regression equation in y=, you can make predictions using all the decimals for your coefficients, without having to type them in manually!
How to use Y-VARS to evaluate a function:
- Press [alpha].
- Press [trace] (f4).
- Press [ ( ].
- Input your value/equation.
- Press [ ) ].
- Press [enter] to calculate.
I also love using the Y-VARS feature to calculate the average rate of change over a particular interval. It allows students to see the slope formula in action! To all you precalculus and calculus teachers, you might like this tip too. Check out the equation below.
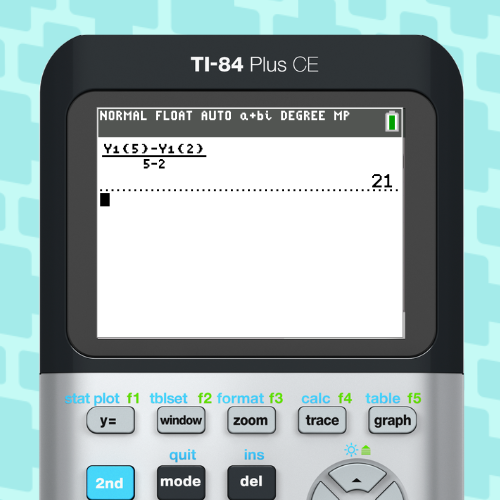
Once students have their rate of change formula set, they can calculate over different intervals without rewriting the whole thing.
How to copy an equation from the home screen:
- Arrow up until the desired past equation is highlighted in blue.
- Press [enter].
- The equation will appear at the bottom of the home screen, ready to be edited.
Bonus tip: You can copy and paste equations into other places, like the y= menu.
How to copy and paste an expression into y=:
- Arrow to and highlight the desired expression.
- Press [enter].
- Press [y=].
- Go to desired y= line.
- Press [2nd].
- Press [enter].
- The expression you copied will be pasted into the y= line.
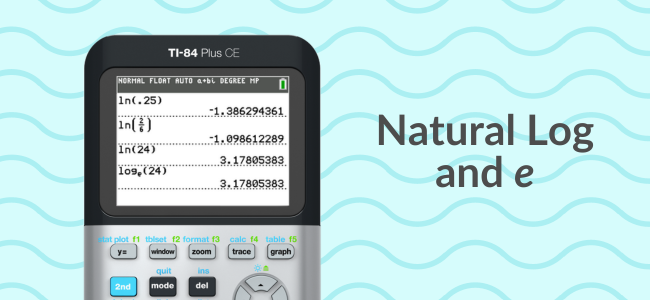
4. Natural Log and e
Natural Log and e go together like peas and carrots, and TI conveniently placed them on the same button!
When discussing continuous growth in the logs and exponentials unit, natural logs and base e come into play. As a teacher, I love asking the question, “Why do you think ln and ex are on the same key?” It’s a great way to help students remember the relationship between the two functions.
How to find a natural log:
- Press [ln].
- Enter your value.
How to find e to any power:
- Press [2nd].
- Press [ln].
- Enter your exponent value.
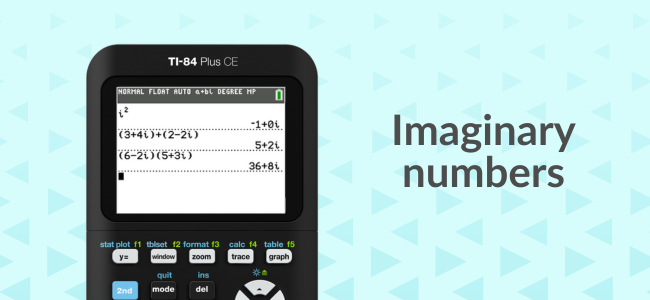
5. Imaginary Numbers
Guess what? The TI-84 Plus CE can handle operations with imaginary numbers! I personally teach my students this tip during the quadratics unit, when imaginary numbers show up.
In my classroom, all operations with imaginary numbers are on the non-calculator portion of assessments. However, students can use this tip to check their answers during class activities, homework, or on any standardized test that allows the use of their TI-84 Plus CE.
You may want to save this tip for standardized test time, or make sure you have both a calculator and non-calculator portion of your assessments during this unit. Remember, the ACT® and SAT® exams are calculator-friendly, so knowing this function could come in handy at crunch time!
How to use imaginary numbers on the TI-84 Plus CE:
- Press [mode].
- Arrow down to the 8th row.
- Select a+bi.
- Press [enter].
To return to the home screen, press [2nd], [mode] (quit).
How to type i on the calculator:
- Press [2nd].
- Press [ . ] ( i ).
6. Transformation App
When I first learned about the transformation app, I was pumped to try it in my classes! There’s a lot to this app, so make sure you take a little time to explore the options before you use it in your class.
This app isn’t something students need to learn to use independently, rather it’s a teaching tool you can use as you explore new functions. It has templates to make entry of common functions easy, but you can also input your own. It makes visualizing transformations fun and interactive, so students can watch graphs move based on inputs, see trails of past graphs, or even compare the graph with a table of values.
How to turn on the Transformation App:
- Press [apps].
- Select option 0: Transfrm.
- Press [enter].
- Press any key to continue.
Now press [y=], and you’ll notice that y1 and y2 look a little different!
The transformation app is a great way to get students talking. Let them create a parent function, then use the app to apply transformations and spark a conversation based on their observations!
There’s much more to this app than I can cover in this blog post, so I’ll leave you with a couple videos to check out if you’d like to see how powerful this app is.
Full Transformations App Tutorial:
Quick Start Transformations App Video:
Keep Learning With Mr. Allen and TI!
For more tips and tricks, be sure to check out my YouTube channel, Mr. Allen Math!. There’s always more to learn about the TI-84 Plus CE, especially as students advance through their math courses.
You can also explore more graphing calculator top tips by subject:
As always, make sure to follow @TICalculators on Facebook, Instagram, X, YouTube and Pinterest to stay up to date on the latest from TI!
SAT® and AP® are trademarks registered by the College Board. ACT is a registered trademark of ACT, Inc. Neither are affiliated with, nor endorse, TI products. Policies subject to change. Visit www.collegeboard.org and www.act.org.