Knowledge Base
Solution 25770: Using the Measurement Transfer Tool on the TI-Nspire™ Family Handheld and Computer Software.
How do I use the Measurement Transfer tool on the TI-Nspire family handheld and computer software?
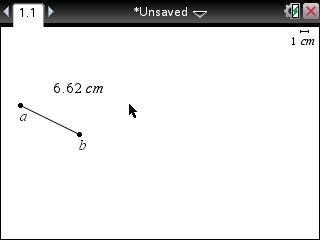
The Measurement Transfer tool can be used to duplicate (transfer) a specific length to a new object. To use the Measure Transfer tool on the TI-Nspire family products, please follow the examples below.To transfer the length of segment ab to a circle using a handheld:
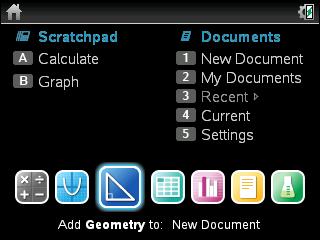
1) Press [home] and select [Geometry].
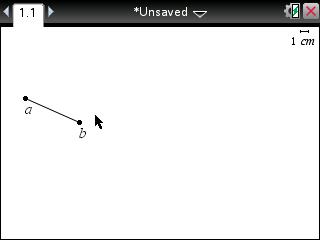
3) Move to a desired location for the starting point for the segment.
4) Press [enter] [A].
5) Move the cursor to the desired ending point.
6) Press [enter] [B] [esc].
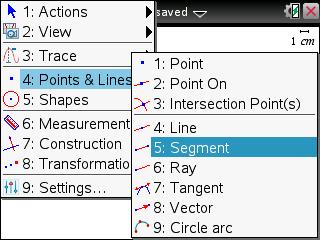
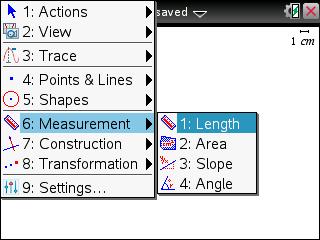
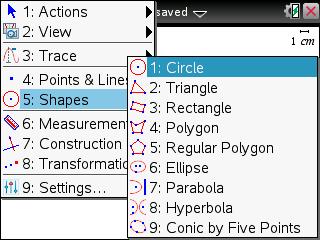
7) Press [menu] [6] [1].
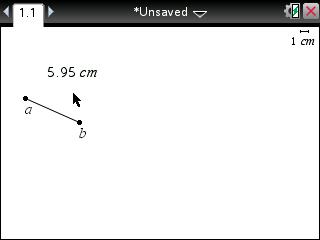
8) Move the cursor on top of segment ab and press [enter].
9) Use the arrow keys to move the value and press [enter] [esc] to set it in a viewable area.
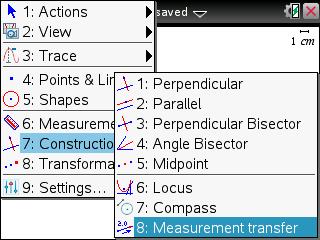
10) Press [menu] [7] [8].
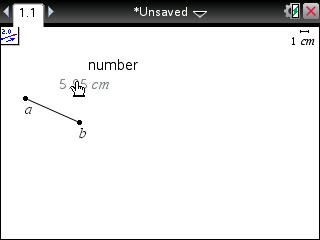
11) Move the cursor on top of the length value and press [enter].
12) Press menu [5] [1]. Notice that the circle already has a pre-determined size.
13) Using the arrow keys, move the circle to a desired location and press [enter] [esc].
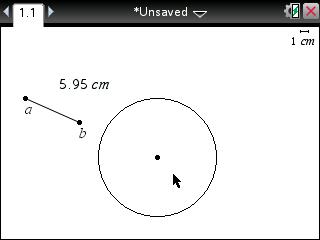
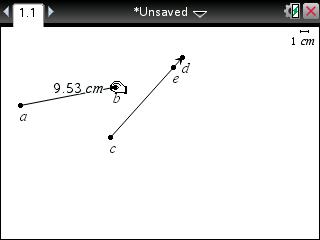
14) The length of segment ab has now been duplicated (transferred) to the circle as the circle's radius.
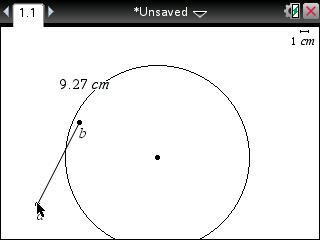
15) Move the cursor on top of either point a or point b and press [ctrl] [click button] to "grab" one of the points. The [click button] is located in the center of the arrow keys.
16) Using the arrow keys, move the "grabbed" point. Notice that as the length of segment ab is changed, the length value is changed as well as the radius of the circle.
17) Press [enter] when finished.
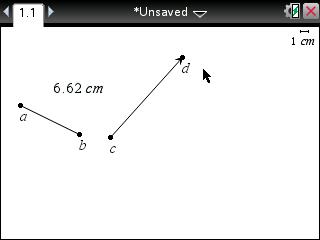
To transfer the length of segment ab to vector cd using the handheld:
Please Note: The same steps can be used to transfer the measurement of segment ab to a "ray" as well. Also, unlike transferring measurements to a circle, when transferring measurements to a vector or ray, the vector or ray will need to be constructed first (before a measurement transfer can be performed).
1) Press [home] and select [Geometry].
4) Press [enter] [A].
5) Move the cursor to the desired ending point.
6) Press [enter] [B] [esc].
7) Press [menu] [6] [1].
8) Move the cursor on top of segment ab and press [enter].
9) Use the arrow keys to move the value and press [enter] [esc] to set it in a viewable area.
10) Press [menu] [4] [8].
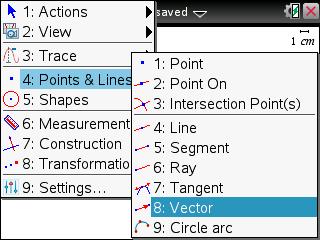
11) Move the cursor to the desired starting location and press [enter] [C].
12) Move the cursor to expand or contract the length of the vector. Press [enter] [D] [esc] when satisfied with the length.
13) Press [menu] [7] [8].
14) Move the cursor on top of the length value and press [enter].
15) Move the cursor on top of vector cd and press [enter]. Notice that a new point is now displayed on vector cd.
16) Input [E] [esc].

17) To verify that the length of segment ab has been duplicated (transferred) to vector cd, using the arrow keys, move the cursor on top of either point a or point b and press [ctrl] [click button] to "grab" one of the points. The [click button] is located in the center of the arrow keys.
18) Using the arrow keys, move the "grabbed" point. Notice that as the length of segment ab is changed, the length value is changed as well as the length of segment ce.