Solution 13305: Inserting and Deleting a Row, Column, or Cell in the Data/Matrix Editor on the TI-89 Family, TI-92 Family and Voyage™ 200 Graphing Calculators.
How do I insert and delete a row, column, or cell in the data/matrix editor on a TI-89 family, TI-92 family or Voyage 200 calculators?
Inserting a Row or Column:
The new row or column is inserted before the row or column that contains the highlighted cell.
In the Data/Matrix Editor:
1) Move the cursor to any cell in the applicable row or column
2) Press [2nd][F6] and select 1:Insert
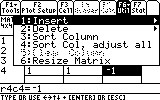
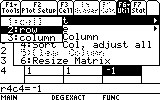
3) Select either 2:row or 3:column
Please Note: When inserting a row in a list or data variable, the row is undefined.
When inserting a row in a matrix variable, the row is filled with zeros.
When inserting a column in a data variable, the column is blank. When inserting a column in a matrix variable, the column is filled with zeros.
Inserting a Cell:
The new cell is inserted before the highlighted cell in the same column. A cell in locked column cannot be deleted.
In the Data/Matrix Editor:
1) Move the cursor to the applicable cell
2) Press [2nd][F6] and select 1:Insert
3) Select 1:Cell. The inserted cell is undefined. Users can then enter a value in the cell.
Deleting a Row or Column in the Data/Matrix Editor:
1) Move the cursor to any cell in the row or column that is to be deleted.
2) Press [2nd][F6] and select 2:Delete
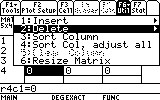
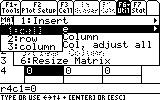
3) Select either 2:row or 3:column
Any rows below the deleted row will shift up and any column to the right of the deleted column will shift left.
Deleting a Cell in the Data/Matrix Editor:
1) Move the cursor to the desired cell that it to be deleted. A cell in locked column cannot be deleted.
2) Press [2nd][F6] and select 2:Delete.
3) Select 1:cell. Any cells below the deleted cell are shifted up.
Please see the TI-89 family, TI-92 family and Voyage 200 guidebooks for additional information.