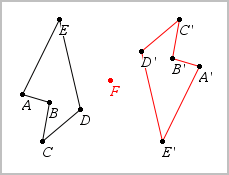
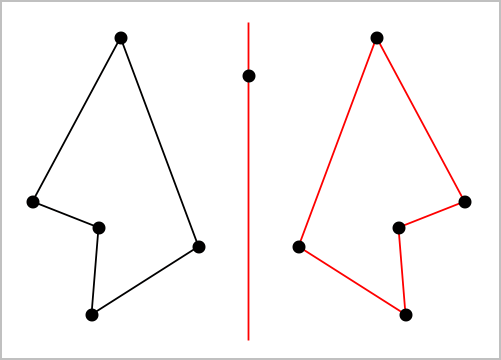
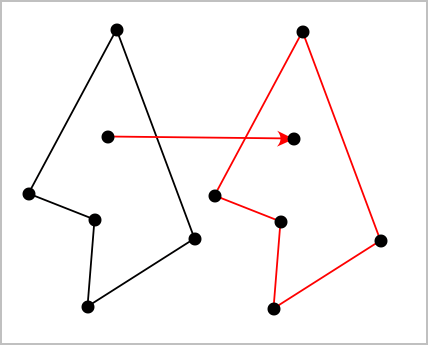
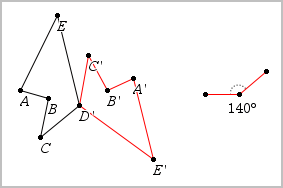
You can apply transformations to drawn objects in both the Graphs and Geometry applications. If the object's points are labeled, the corresponding points in the transformed object are labeled using prime notation (A → A'). To enable automatic labeling of certain objects, see What You Must Know in this chapter.
1. | From the Transformation menu, select Symmetry. (In the Graphs application, click Geometry > Transformation > Symmetry.) |
2. | Click the object whose symmetry you want to explore. |
3. | Click a location or existing point to establish the point of symmetry. |
A symmetrical image of the object is displayed.
4. | Manipulate the original object or the point of symmetry to explore the symmetry. |
1. | Create a line or segment to predefine the line about which the object will be reflected. |
2. | From the Transformation menu, select Reflection. (In the Graphs application, click Geometry > Transformation > Reflection.) |
3. | Click the object whose reflection you want to explore. |
4. | Click the predefined reflection line or segment. |
A reflected image of the object is displayed.
5. | Manipulate the original object or the line of symmetry to explore the reflection. |
1. | (Optional) Create a vector to predefine the distance and direction of translation. |
2. | From the Transformation menu, select Translation. (In the Graphs application, click Geometry > Transformation > Translation.) |
3. | Click the object whose translation you want to explore. |
4. | Click the predefined vector. —or— Click two locations on the work area to indicate the direction and distance of translation. |
A translated image of the object is displayed.
5. | Manipulate the original object or the vector to explore the translation. |
1. | (Optional) Create an angle measurement to serve as a predefined angle of rotation. |
2. | From the Transformation menu, select Rotation. (In the Graphs application, click Geometry > Transformation > Rotation.) |
3. | Click the object whose rotation you want to explore. |
4. | Click a location or point to define the point of rotation. |
5. | Click the points of the predefined angle. —or— Click three locations to define an angle of rotation. |
A rotated image of the object is displayed.
6. | Manipulate the original object or the point of rotation to explore the rotation. |
1. | Create a Text object containing a numeric value to serve as a predefined dilation factor. |
Note: You can also use a measured length value as the dilation factor. Keep in mind that if you use a large value, you may have to pan the display to view the dilated object.
2. | From the Transformation menu, select Dilation. (In the Graphs application, click Geometry > Transformation > Dilation.) |
3. | Click the object whose dilation you want to explore. |
4. | Click a location or existing point to define the center point of dilation. |
5. | Click the Text object or measurement that defines the dilation factor. |
A dilated image of the object is displayed.
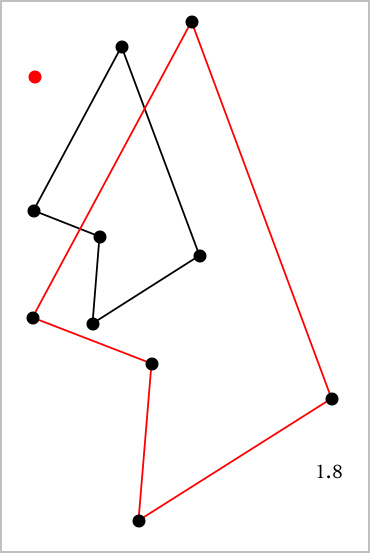
6. | Manipulate the original object or the center point of dilation to explore the dilation. You can also edit the dilation factor. |