By default, the Start Collection button ![]() overwrites collected data with data from the next run. To preserve each run, you can store it as a data set. After collecting multiple data sets, you can superimpose any combination of them on the Graph View.
overwrites collected data with data from the next run. To preserve each run, you can store it as a data set. After collecting multiple data sets, you can superimpose any combination of them on the Graph View.
Important: Stored data sets are lost if you close the document without saving it. If you want stored data to be available later, make sure to save the document.
| 1. | Collect the data from the first run. (See Collecting Data.) |
| 2. | Click the Store Data Set button |

The data is stored as run1. A new data set, run2, is created for collecting the next run.
| 3. | Click Start Collection |
| 1. | Click the Graph View icon |
| 2. | Click the Data Set Selector (near the top of the Detail View) to expand the list of data sets. |
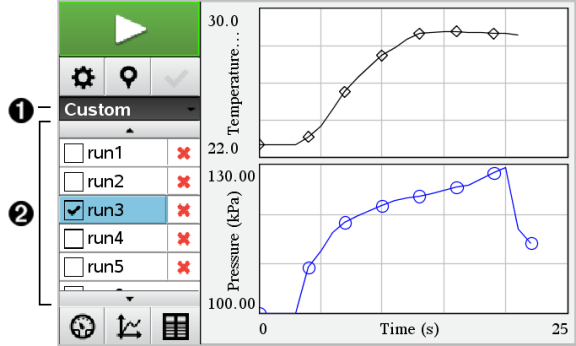
|
À |
Data Set Selector lets you expand or collapse the list. |
|
Á |
Expanded list shows available data sets. Scroll buttons appear as necessary to let you scroll the list. |
| 3. | Choose which data sets to view by selecting or clearing the tickboxes. |
The graph is rescaled as necessary to show all selected data.
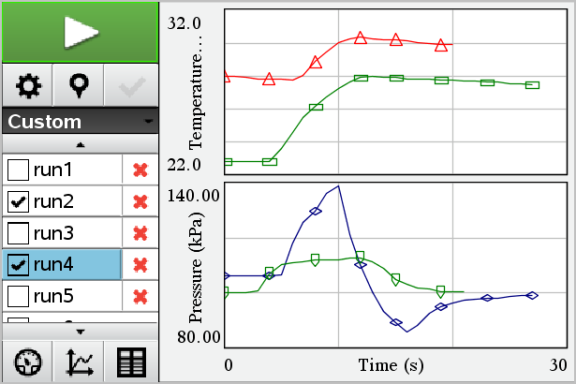
Tip: To quickly select a single data set, hold down Shift while clicking its name in the list. The graph shows only the selected set, and the list is collapsed automatically to help you view details of the data.
By default, data sets are named run1, run2 and so on. The name of each data set is displayed in the Table view.
| 1. | Click the Table View icon |
| 2. | Display the context menu for the table view, and select Data Set Options > [current name]. |
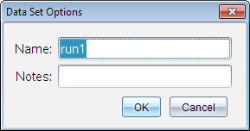
| 3. | Type the new Name. |
Note: The maximum character limit is 30. The name cannot contain commas.
| 4. | (Optional) Type Notes about the data. |
| 1. | Click the Graph View icon |
| 2. | Click the Data Set Selector (near the top of the Detail View) to expand the list of data sets. |
| 3. | Scroll the list as necessary, and then click the Delete symbol (X) next to the name of the data set. |
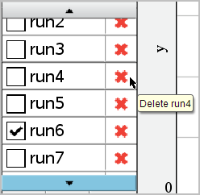
| 4. | Click OK on the confirmation message. |
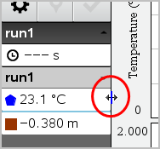
| ▶ | Drag the boundary at the right edge of the Details area to increase or decrease its width. |
 Storing Data as Sets