INVITATIONS
| • | INVITATIONS - shows the total number of invitations sent and the number of users who have opened the invitation/registered as a result. |
Inviting Single IT Admin or Single User to Create and Account
Invite users to join, maybe another administrator to help manage licenses. Invitations may be issued to a user to join a particular group or class. Email invitations may be sent to a user to create an account and join a particular group or class.
Tip: In order to ensure the proper delivery of emails, make sure users are allowed emails from edtech-mail.ti.com.
Example: noreply@edtech-mail.ti.com
Note: This is used when inviting teachers, students, or other Admins that cannot use Google/Microsoft SSO. When using import users, no invitation is sent.
Inviting a User
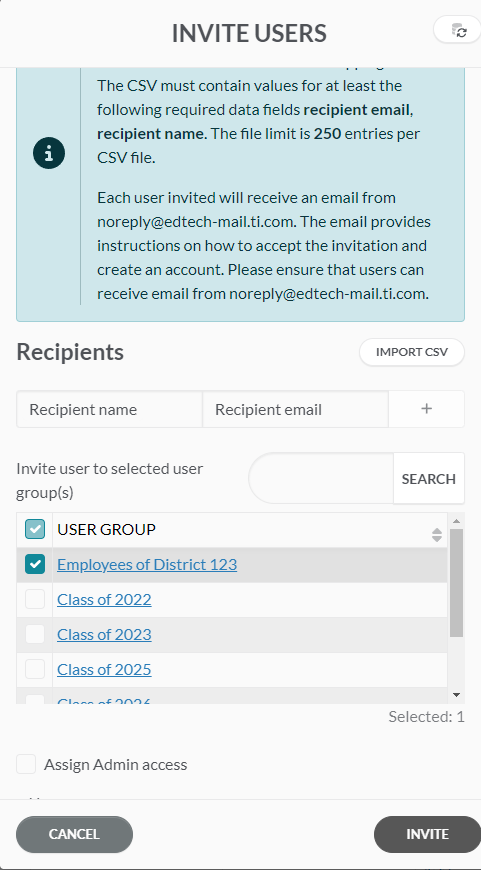
Selecting the Create button opens the INVITE USER dialog box. Enter the following information:
| • |
| • | Name |
| • | Invite user to select user group(s) |
| – | SELECT ALL |
| – | [name of group(s)] |
| • | Assign Admin access |
| – | Note: this enables the user to administer licenses and change users/groups. |
| • | Message |
|
|
Be sure to check Assign Admin access when you want a teacher or another administrators to assist with managing licenses. Warning: you may not want to give this access to students or all users. |

Select INVITE to complete.
Bulk Invitation Process
Bulk invitation method is best used when:
| • | End user can receive an invitation email from noreply@edtech-mail.ti.com to create an account |
| • | School or the individual user cannot use Google/Microsoft SSO |
As with Bulk Imports, before you begin Bulk Invitations into the TI's OrgAdmin, you will need to create a CSV file. This CSV file lists only the users you intend to use the license and that you wish to invite into the TI's OrgAdmin.
Note: CSV column headers are supported in English only. Localization of languages is NOT currently supported for the .CSV column headers automatically.
Note: The following is required in the CSV – other wise it could fail
| • | Header row indicating which column is the Email and which is the Name. |
| – | Note: Bulk invitations only require two columns - email address and name used in email invitations |
| • | No extra lines in the file |
| • | No extra commas in the file |
| • | Only 250 rows of data permitted |
Creating the CSV File for Bulk Invitations
When creating the CSV file remember the following parameters apply:
| • | Use a valid email address. |
Reminder: User Groups need to be created first. See Creating User Groups
See Also: Accept License Invitation
Begin the Bulk Invitation Process
Selecting the Create button opens the INVITE USER dialog box.
|
|
There is a search option if you do not see the group you are trying to invite.
Click to select or deselect the groups you want to invite.
At least one group must be selected. |
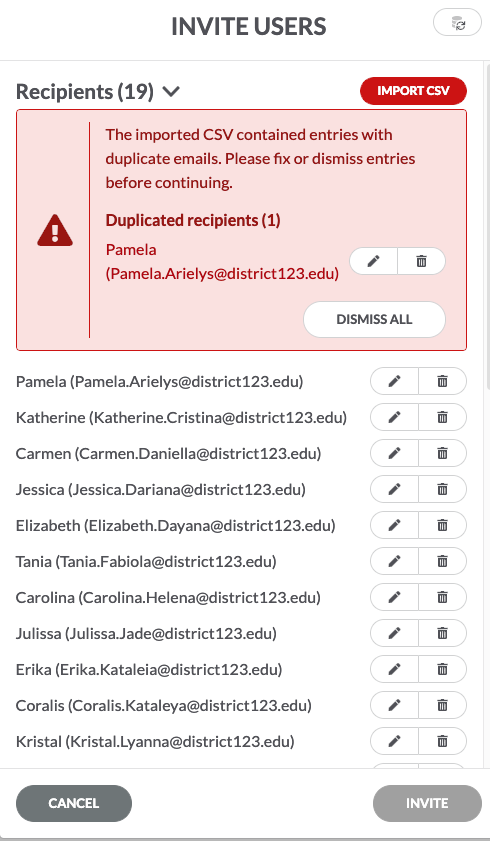
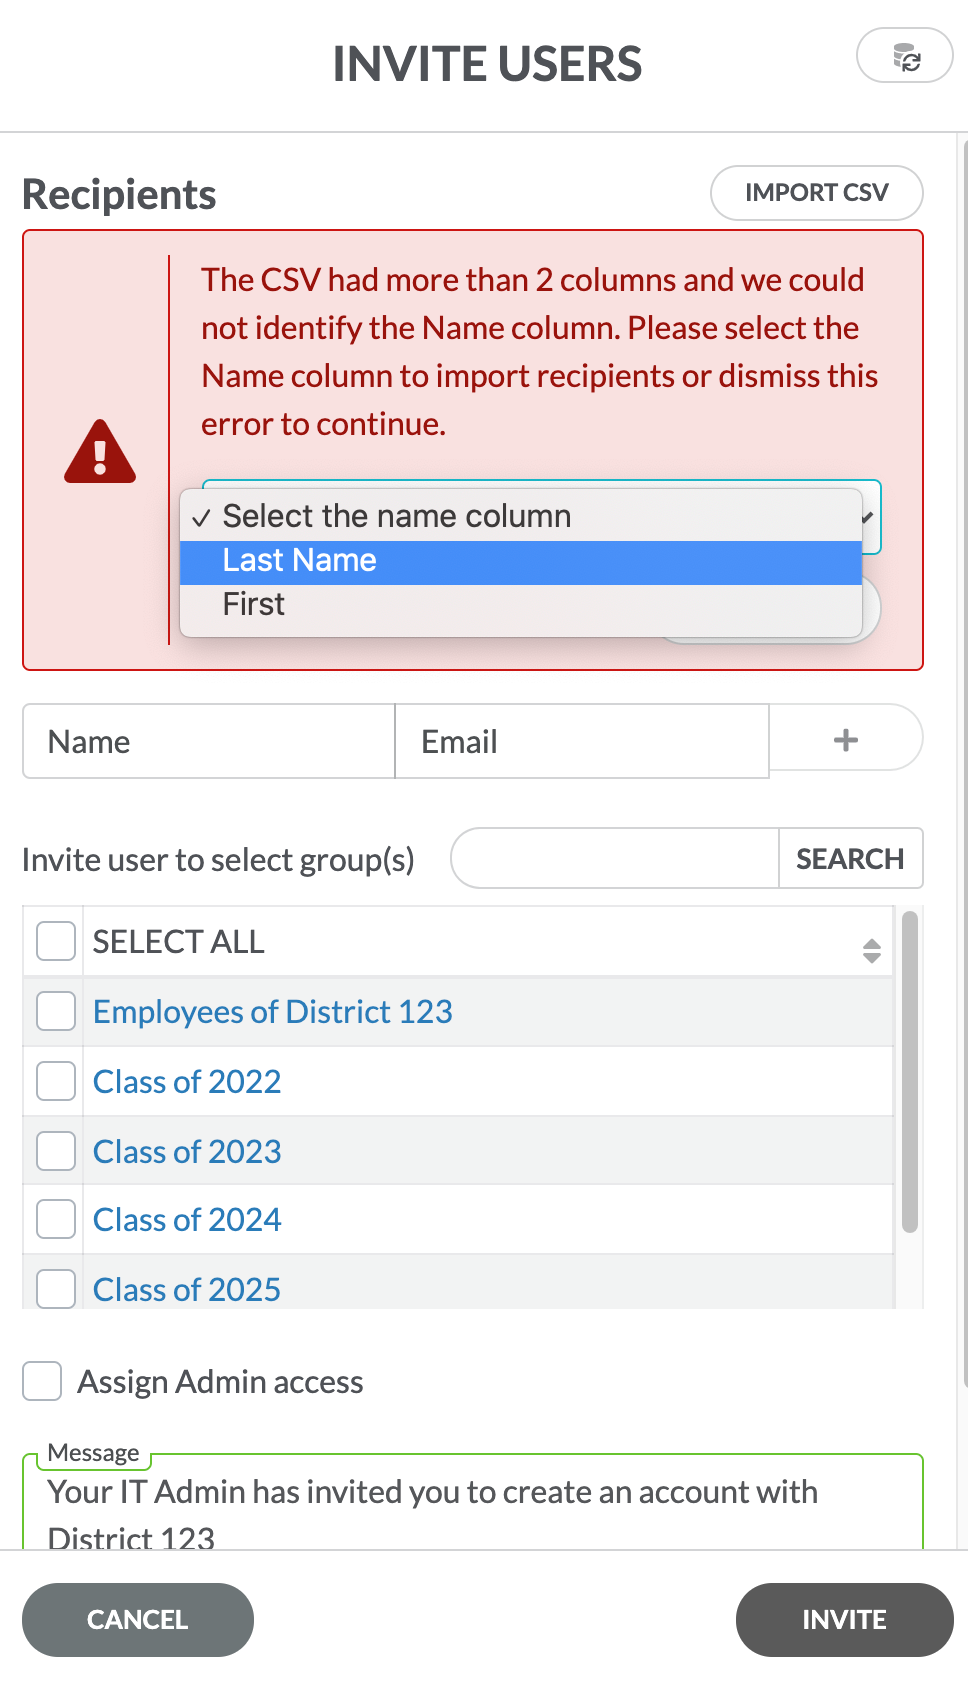
Possible Errors
Error correction recommendations are visible in the top sections.
|
|
|
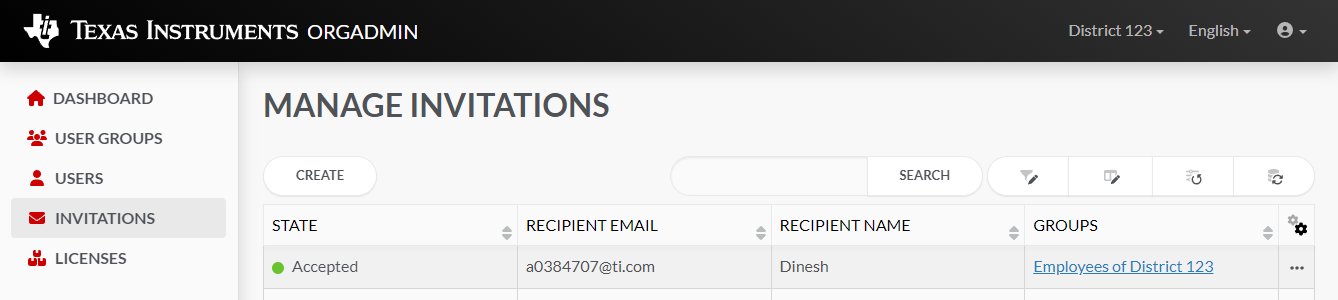
Managing Invitations
Additional Options
There are additional options to each entry in Invitations.
From the INVITATIONS tab on the TI's OrgAdmin Dashboard, you can View details and Remove by selecting  .
.
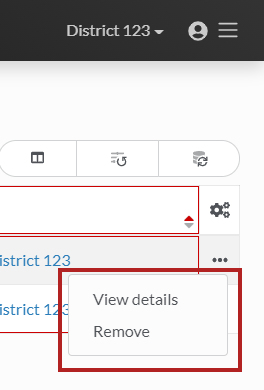
Select from the ellipses, :
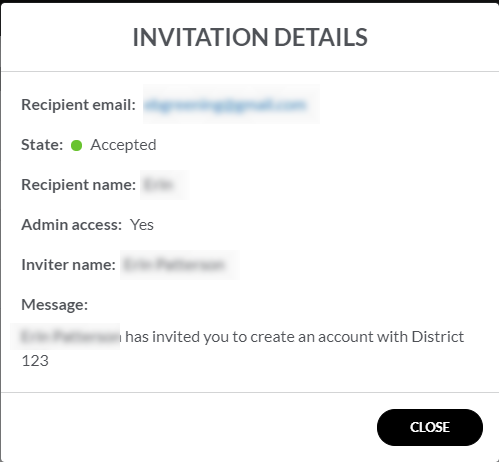
| • | View details - option to view invitation details. |
|
|
|
| • | Remove - option to remove an invitation. |
|
|
|
