The Welcome Screen opens the first time you start the software after installation and setup are complete.
To begin working with documents, click an icon or link, or close this screen manually.
Note: Depending on how your software was installed, you might see a Product Improvement screen the first time you start the software.
|
À |
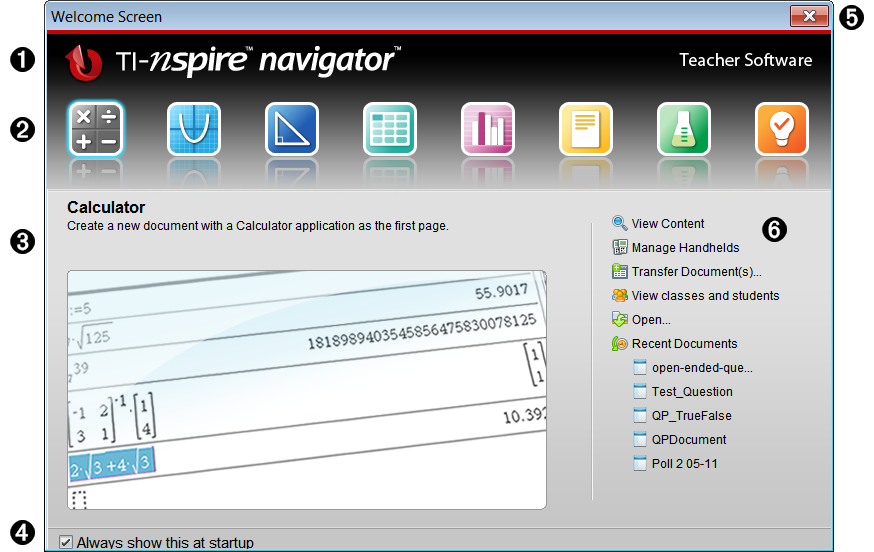
Name. Shows software name. |
||||||||||||||||||
|
Á |
Quick Start icons. Click one of these icons to create a new document in the chosen application. The icon applications are Calculator, Graphs, Geometry, Lists & Spreadsheet, Data & Statistics, Question, Notes, and the Vernier DataQuest™ app. The Welcome Screen automatically closes and the chosen application opens. |
||||||||||||||||||
|
 |
Preview area. When your mouse is hovering over an application icon or a link in Teacher Tools, this area shows a preview of the application or tool. A brief description of the icon or link is also displayed at the top of the area. |
||||||||||||||||||
|
à |
Always show this at startup. Clear this check box to skip this screen when you open the software. |
||||||||||||||||||
|
Ä |
Close the Welcome Screen. Click here to close this screen and begin working in the software. |
||||||||||||||||||
|
Å |
Teacher Tools. Click one of these links to close the Welcome Screen and open the software in the chosen tool.
|
| ▶ | Press Tab to navigate through the icons. |
| ▶ | Press Shift + Tab to go backward through the icons. |
| ▶ | Click to act on the selected icon. |
As you move through the icons, the Preview area shows a preview of the application.
The Welcome Screen opens automatically when you open the software. To open the screen manually, do the following:
| ▶ | Click Help > Welcome Screen. |