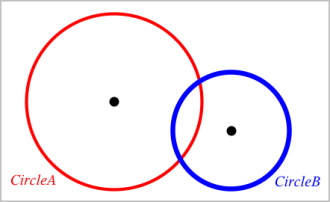
You can select an individual object or multiple objects. Select multiple objects when you want to quickly move, color, or delete them together.
| 1. | Click an object or graph to select it. |
The object flashes to indicate selection.
| 2. | Click any additional objects to add them to the selection. |
| 3. | Perform the operation (such as moving or setting color). |
| 4. | To deselect all objects, click an empty space in the work area. |
Grouping objects gives you a way to reselect them as a set, even after you have deselected them to work with other objects.
| 1. | Click each object to add it to the current selection. |
The selected objects flash.
| 2. | Display a context menu of the selected object or objects. |
| 3. | Click Group. You can now select all the items in the group by clicking any of its members. |
| 4. | To split a group into individual objects, display a context menu of any of its member objects, and click Ungroup. |
| 1. | Display the context menu of the object or objects. |
| 2. | Click Delete. |
You cannot delete the origin, the axes, or points representing locked variables, even if those items are included in the selection.
You can move an object, group, or combination of selected objects and groups.
Note: If an immovable object (such as the graph axes or a point with locked coordinates) is included in a selection or group, you cannot move any of the objects. You must cancel the selection and then select only movable items.
Holding down the SHIFT key before dragging lets you constrain how certain objects are drawn, moved, or manipulated.
Use the constraint feature to:
| • | Rescale only a single axis in the Graphs application. |
| • | Pan the work area horizontally or vertically, depending on which direction you drag initially. |
| • | Limit object movement to horizontal or vertical. |
| • | Limit point placement to 15° increments as you draw a triangle, rectangle, or polygon. |
| • | Limit angle manipulations to 15° increments. |
| • | Limit the radius of a resized circle to integer values. |
Pinning objects prevents accidental changes as you move or manipulate other objects.
You can pin graphed functions, geometric objects, text objects, the graph axes, and the background.
| 1. | Select the object or objects to pin, or click an empty area if you are pinning the background. |
| 2. | Display the context menu, and select Pin. |
A pinned object displays a pin icon  when you point to it.
| 3. | To unpin an object, display its context menu, and select Unpin. |
Notes:
| • | Although you cannot drag a pinned point, you can reposition it by editing its x and y coordinates. |
| • | You cannot pan the work area while the background is pinned. |
Color changes made in the software are displayed in shades of gray when you work on documents using a TI-Nspire™ CX handheld that does not support color. Color is preserved when you move documents back to the software.
| 1. | Select the object or objects. |
| 2. | Display the object’s context menu, click Color, and then click Line Color or Fill Color. |
| 3. | Select the color to apply to the objects. |
| 1. | From the Actions menu, select Attributes. |
| 2. | Click the object that you want to change. You can change shapes, lines, graphs, or graph axes. |
The list of the attributes for the selected object are displayed.
| 3. | Press 9 and : to move through the list of attributes. |
| 4. | At each attribute icon, press 7 or 8 to move through the options. For example, select Thick, Thin, or Medium for the Line Weight attribute. |
| 5. | Press Enter to apply the changes. |
| 6. | Press ESC to close the Attributes tool. |
| 1. | Display the context menu of the object. |
| 2. | Click Label. |
| 3. | Type the text of the label, and then press Enter. |
The label attaches itself to the object and follows the object as you move it. The label's color matches the object's color.

 Selecting and Deselecting Objects