You can update a single roster or multiple class rosters with new student information by importing a CSV file with updates.
Note: You cannot change existing student information or remove students already in the TI-Nspire™ Navigator™ database.
You can import a comma-separated value (CSV) file or a *.txt file. The CSV or .txt file should have this information:
Class Name
Section Name (optional)
Student First Name
Student Last Name
Student User Name
Student ID (optional)
Password (optional)
| 1. | Use the Workspace selector to select the Class Workspace. |
| 2. | Select the class for which you want to update the roster. |
Note: Class cannot be started.
| 3. | Click Class > Update Class Roster. |
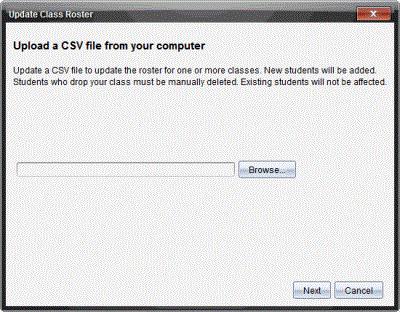
The Update Class Roster dialog box opens.

| 4. | Click Browse to navigate to the file on your computer. |
| 5. | Select the file that contains the new students you want to import. |
| 6. | Click Open. |
The Update Class Roster dialog box shows the file.
| 7. | Click Next. |
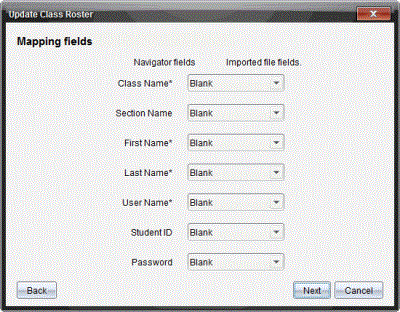
The Mapping fields dialog box opens.

| 8. | Click ¤ and select a field from the drop-down lists to map the headings in your comma-delimited file. |
| 9. | Click Next. |
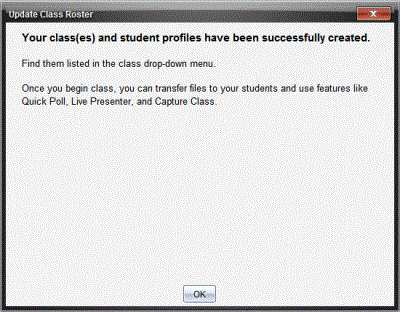
A dialog box displays showing completion status.

| 10. | Click OK to close. |
Note: If some students did not import successfully, click View Details to determine the problem.