|
1.
|
Click or click  . . |
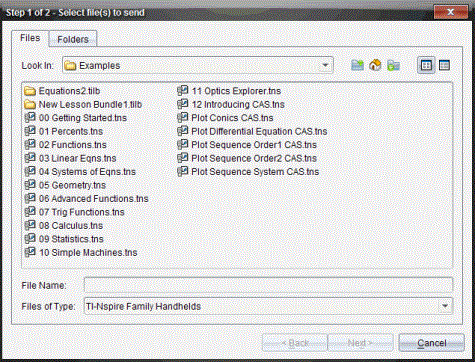
The Select file(s) to send dialog box opens.

|
2.
|
Click the tab to choose files, or click the tab to choose folders. |
Note: You can send only files or folders, not a combination of files and folders.
|
•
|
TI-Nspire™ CX Premium Teacher Software for handhelds transfers only .tns files. |
|
3.
|
To choose the files or folders you want to send, do one of the following: |
|
•
|
Navigate to the file or folder you want to send and click it. To select multiple files or folders, press and hold the Ctrl key (Mac®: “) while clicking each file name. |
|
•
|
Type the name of the file or folder in the or box. Folder names may use alphanumeric characters, but cannot contain the special characters / \ : " | * ? < > , and cannot contain these words: |
lpt1, lpt2, lpt3, lpt4, lpt5, lpt6, lpt7, lpt8, lpt9, com1, com2, com3, com4, com5, com6, com7, com8, com9, aux, con, prn, nul.
You can also drag files from a file browser window to the Class Record to send files.
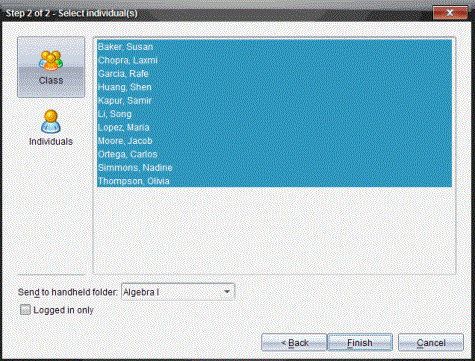
The Select individual(s) dialog box opens.

|
5.
|
Select the student(s) to whom you want to send the file: |
|
•
|
To send the file to the whole class, click  . To send the file only to class members who are currently logged in, select the check box. . To send the file only to class members who are currently logged in, select the check box. |
|
•
|
To send the file to an individual student, click  , and then click the student. , and then click the student. |
If you had any students selected in the classroom area, the software already has them selected.
|
•
|
Use the drop-down list to choose from the current class folder, the top level folder on the handheld, or the last 10 folders that files were sent to. (Available only in TI-Nspire™ software that supports handhelds.) |
|
-
|
You can also enter a folder name path in the drop-down list. |
The file transfer appears in the Class Record.
 Sending Files
 .
.

 . To send the file only to class members who are currently logged in, select the
  , and then click the student.