Adding Students to Classes
After you create classes, you need to add students to the classes. You can add students to an active class session, or you can add students to any class at any time.
These instructions explain how to add students after you create a class.
|
1.
|
Select the class to which you want to add students. |
|
•
|
If class is in session, the student will be added to the current class. You have the option of adding the student to other classes. |
|
•
|
If class is not in session, use the Class Session controls to select the class to which you want to add the student. |

|
2.
|
Click or click  . . |
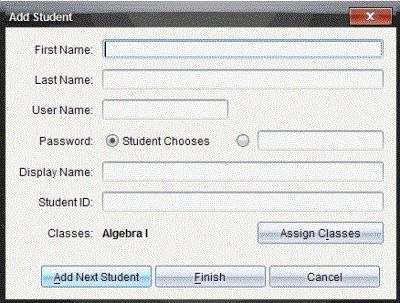
The Add Student dialog box opens.

|
3.
|
Type the student’s first name and last name. |
The user name you choose must be unique. It cannot exist in the current class or any other class.
|
5.
|
If you want your student to create their own password, select . |
—or—
If you want to create a password for your student, select the blank password entry box and type a new password.
|
6.
|
(Optional) Type a display name. |
If you leave the display name blank, the software uses the student’s first name as the display name.
|
7.
|
(Optional) Type a student ID. |
|
8.
|
(Optional) Assign the student to other classes: |
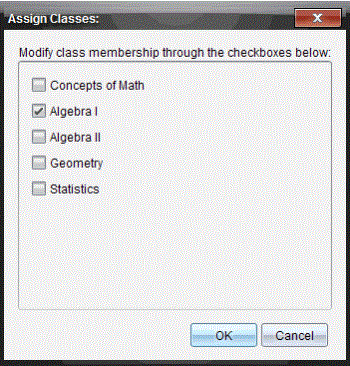
The Assign Classes dialog box opens.

|
•
|
Select the check boxes of the student’s classes. |
|
•
|
Clear the check boxes of the classes to which the student does not belong. |
The Add Student dialog box opens.
|
9.
|
If you need to add another student, click and repeat steps 3 – 8. |
|
10.
|
When all students are added, click . |

 .
.
