When you start using the TI-Nspire™ software, one of the first things you should do is create your classes. Make sure you create a class for each of the class periods you plan to teach.
If this is your first time using the TI-Nspire™ software, the classroom area may be empty. You can complete the following steps at any time.
The Add Classes Wizard guides you through the process of setting up classes. The software prompts you to add a class, and to add students to the class. You can choose to add classes manually or using a CSV file.
| 1. | Use the Workspace selector to select the Class Workspace. |
| 2. | Click Class > Add Classes or click |
The Add Classes dialog box opens.
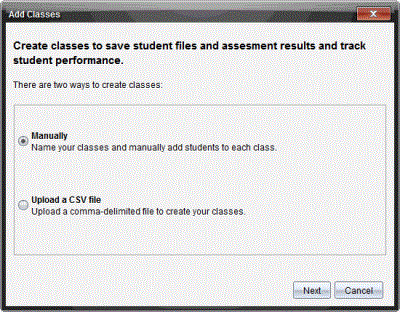
| 3. | Select Manually from the Add Classes dialog box. |
| 4. | Click Next. |
The Add Classes Manually dialog box opens.
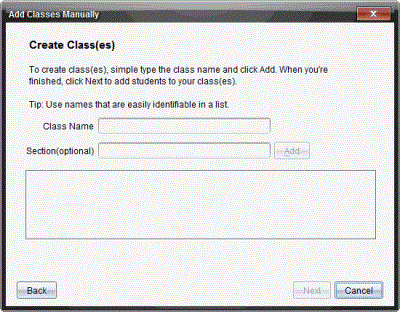
| 5. | Type a Class Name. If needed, you can also provide a Section. |
A class name must be between 3 and 32 alphanumeric characters. The class name cannot contain the special characters / \ : " | * ? < > , and cannot contain these words:
lpt1, lpt2, lpt3, lpt4, lpt5, lpt6, lpt7, lpt8, lpt9, com1, com2, com3, com4, com5, com6, com7, com8, com9, aux, con, prn, nul.
| 6. | Click Add. |
The Add Classes Manually dialog box shows the class listed.
| 7. | Continue adding classes, and click Next when you are done. |
A dialog box displays showing successful class creation and asking if you want to add students.

| 8. | Click Add Student. |
Note: Click Finish to Add Students later.
You can add classes with a CSV upload, and import a list of students into the class. Use the CSV upload option to import student information from a comma-separated values (CSV) file or a text (.txt) file.
The CSV or .txt file should have this information:
Class Name
Section Name (optional)
Student First Name
Student Last Name
Student User Name
Student ID (optional)
Password (optional)
| 1. | Use the Workspace selector to select the Class Workspace. |
| 2. | Click Class > Add Classes or click |
The Add Classes dialog box opens.
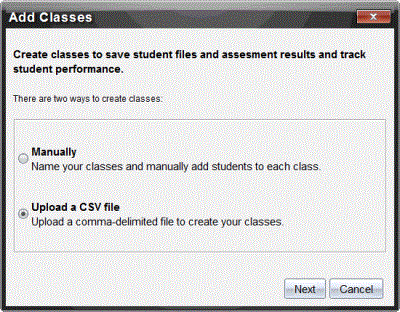
| 3. | Select Upload a CSV file from the Add Classes dialog box. |
| 4. | Click Next. |
The Add Classes by Uploading a CSV File dialog box opens.
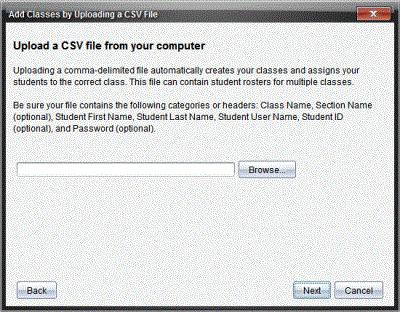
| 5. | Click Browse to navigate to the file on your computer. |
| 6. | Select the file that contains the students you want to import. |
| 7. | Click Open. |
The Add Classes by Uploading a CSV File dialog box shows the file.
| 8. | Click Next. |
The Mapping fields dialog box opens.
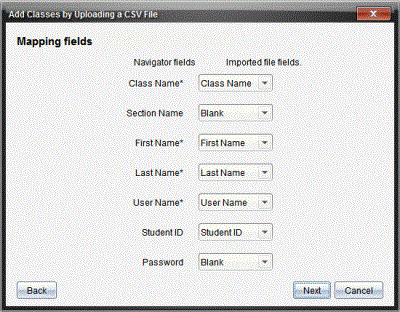
| 9. | Click ¤ and select a field from the drop-down lists to map the headings in your comma-delimited file. |
| 10. | Click Next. |
A dialog box opens showing completion status.
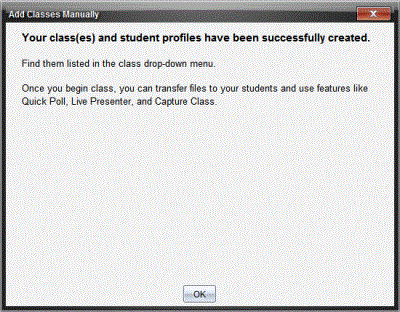
| 11. | Click OK to close |
Note: If some students did not import successfully, click View Details to determine the problem.
 Adding Classes Manually