Working with Problems
Like a TI-Nspire™ document, a PublishView™ document consists of one or more problems.
Problems are used to control the layout of a PublishView™ document so that you can isolate variables. When variables with the same name are used in multiple problems, variables can have different values. To add problems to PublishView™ documents, open the Sheet context menu or use the options on the Insert menu in the Documents Workspace. When adding problems, keep the following guidelines in mind:
|
•
|
By default, a new PublishView™ document contains one problem. |
|
•
|
You can insert a problem after any existing problem. |
|
•
|
You cannot insert a problem in the middle of an existing problem. |
|
•
|
A new problem break is always inserted after the selected problem. |
|
•
|
Inserting a problem break adds empty space below the break. |
|
•
|
Any object between two problem breaks is part of the problem above the break. |
|
•
|
The last problem includes all sheets and objects below the last problem break. |
|
•
|
Problem breaks are not relative to any object, which lets you move objects within a problem without affecting the problem break location. |
Adding a Problem
To add a problem to an open PublishView™ document:
|
1.
|
Right-click anywhere on the sheet, and then click . |
The problem is added to the document below any existing problems. The problem break provides a visible divider between problems.

|
2.
|
To name the problem, highlight the default text, type a name, and then click outside the text box to save the name. |
The problem break is saved.

If a document has multiple problems, use the scroll bar on the right side of the document to move up and down through the problems.
Managing Problem Breaks
Problem breaks are used to separate problems and variable sets.
|
•
|
Every problem has a problem break. |
|
•
|
A problem break becomes visible when a problem is added to a document. |
|
•
|
A problem break is represented by a dashed line with the name of the problem positioned on the left side of the sheet. |
|
•
|
By default, the problem name is shown as . Highlight the default text to type a new name for the problem. |
|
•
|
Problem names do not have be unique. Two problems can have the same name. |
Hiding and Showing Problem Breaks
You can select to hide or show problem breaks in a PublishView™ document. By default, problem breaks are shown.
|
1.
|
Right-click in any blank area of the document (outside of any object) to open the sheet context menu. |
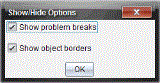
The Show/Hide Options dialogue box opens.
Note: You can also click .
|
3.
|
Clear the option to hide problem breaks in the document. Select the option to return to the default setting and show the problem breaks. |
|
4.
|
Click to close the dialogue box. |
Renaming a Problem
|
1.
|
Click the existing problem name on the problem break line. |
|
2.
|
Type a new name for the problem. |
|
3.
|
Click outside the text box to save the new name. |
Deleting a Problem
To delete a problem, complete one of the following actions:
|
▶
|
Select the problem break and click  on the right side of the break. on the right side of the break. |
|
▶
|
Right-click the problem break and click . |
|
▶
|
Select the problem break and press the or key. |
When you delete a problem, all objects contained in the problem are removed and the space between the selected problem break and the next problem break is removed.