Working with Images
Images can be added to PublishView™ documents as PublishView™ objects or can be added inside TI-Nspire™ applications that support images. Supported files types are .bmp, .jpg and .png files.
Note: If a TI-Nspire™ application is active in the PublishView™ document, the image is added to the TI-Nspire™ page if you click I from the menu bar or context menu. If there is no TI-Nspire™ document active, the image is added as a PublishView™ object. Only images inside TI-Nspire™ applications convert to TI-Nspire™ documents (.tns files).
Inserting an Image
|
1.
|
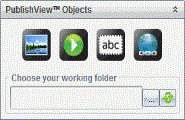
Ensure the PublishView™ Objects pane is open. |
|
2.
|
Click  , and then drag the icon to the document. , and then drag the icon to the document. |
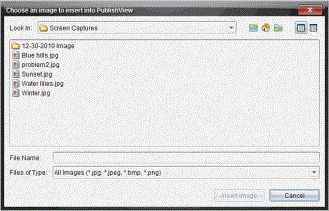
The dialogue box opens.
Note: By default, the Texas Instruments preloaded images folder is displayed.
|
3.
|
Navigate to the folder where the image file you want to insert is located, and then highlight the file name. |
The image is added to the PublishView™ sheet.

|
5.
|
Using the mouse, grab the handles to resize the text box, |
—or—
Grab any border to position the text box in the document as needed.
Moving Images
|
1.
|
Click the frame containing the image to select it. |
|
2.
|
Move your cursor over the edge of the image to activate the positioning tool.  |
|
3.
|
Move the image to its new location on the PublishView™ sheet. |
Note: Objects can overlap each other on a PublishView™ sheet.
Resizing Images
|
1.
|
Click the frame containing the image to select it. |
|
2.
|
Move your cursor over one of the blue handles to activate the resizing tool.  |
|
3.
|
Drag the handle to make the image smaller or bigger. |
Deleting Images
|
▶
|
Click the image to select it, and then press the key. |
—or—
|
▶
|
Right-click a handle to open the context menu, and then click . |