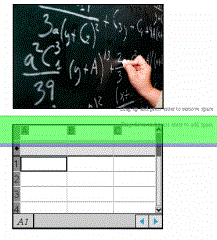
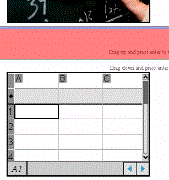
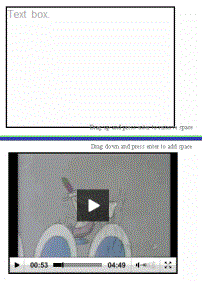
A PublishView™ document can have multiple sheets. A single sheet is displayed in the workspace on your screen. All work occurs in the PublishView™ objects and TI-Nspire™ applications within sheets.
Adding Sheets to a Document
To add a sheet to a document:
| ▶ | Click Insert > Sheet. |
The sheet is added to the document and the numbering increments by one.
Opening the Sheet Context Menu
| ▶ | Right-click in any blank area (outside of any object) in a PublishView™ sheet. |
A context menu opens with options for inserting problems, pages, applications and PublishView™ objects, edit options for removing space or deleting a page and options for hiding and showing problem breaks and object borders.

Page Numbering
In a PublishView™ document, page numbering is displayed in the bottom margin (footer). By default, numbering is placed in the centre of the PublishView™ sheet in a # of # format. You cannot edit or delete page numbering.
Working with Headers and Footers
PublishView™ documents contain space at the top and bottom of a sheet to add a header or a footer. Headers and footers can contain the date, the document name, the lesson plan name, the class name, your school’s name, or any other information needed to identify a document.
By default, headers and footers do not contain content and boundaries for the header and footer are hidden. To activate a header or footer for editing, click inside the top or bottom margin. When activated, a text box with a light grey border is displayed.
Inserting and Editing Text in Headers and Footers
| 1. | Click inside the top or bottom margin. |
The text box borders in the margin become visible and the object space is disabled. The cursor is placed in the header or footer space and the formatting toolbar becomes active.

| 2. | Type the text. |
| • | The default font is TI-Nspire™ true type, 12 pt, normal. |
| • | By default, text is centreed horizontally and vertically. |
| • | Text can be aligned: left, centre, right, or justified. |
| • | Text that does not fit within the text box horizontally will wrap to the next line. |
| • | Text that does not fit within the text box vertically will not be shown, but text is retained. (If you delete text, the hidden text will appear.) |
| 3. | Complete one of the following actions to save the text: |
| • | Single-click anywhere outside the header or footer text box to save the text. |
| • | Press Esc to save the text. |
The PublishView™ sheet becomes active and the formatting menu closes.
Showing and Hiding Borders
By default, borders are displayed when you insert an object into a problem. When you select to hide borders, the selection applies to all objects in the document and to objects that you add to the document. To hide the border:
| 1. | Right-click in any blank area of the sheet (outside of any object) to open the context menu. |
| 2. | Click Layout Options. |
The Layout Options dialogue box opens.
Note: You can also click View > PublishView™ Layout Options.

| 3. | Clear the Show object borders option to hide the borders around the objects in the problem. Select the option to return to the default setting and show borders. |
| 4. | Click OK to close the dialogue box. |
Adding and Removing Space
To manage how PublishView™ objects appear on a sheet, you may need to add or delete space between objects.
Note: You can add and remove vertical space between objects using this method. To add or remove horizontal space between objects, move the object.
Adding Space
| 1. | Right-click in the area outside of any object where you want to add space. The context menu opens. |
| 2. | Click Edit > Add/Remove Space. The Add/Remove Space tool becomes active. |
|
|
Add/Remove Space tool |
| 3. | Use your mouse to position the tool to the exact place where you want to add space. |
| 4. | Click the tool, and then drag down to select the amount of space you want to add. As you select the amount of space to be added, it is indicated in green. |

| 5. | Press the Enter key to add the space in between the objects. You can adjust the amount of space by dragging up and down before you press Enter. |
Removing Space
| 1. | Right-click in the area outside of any object where you want to remove space. |
The context menu opens.
| 2. | Click Edit > Add/Remove Space. |
The Add/Remove Space tool becomes active.
|
|
Add/Remove Space tool |
| 3. | Use your mouse to position the tool to the exact place where you want to remove space. |
| 4. | Click the tool, and then drag up to select the amount of space you want to remove. As you select the amount of space to be removed, it is indicated in red. |

| 5. | Press the Enter key to remove the space in between the objects. You can adjust the amount of space by dragging up and down before you press Enter. |
Note: If there is not enough space on the sheet to accommodate the objects, the objects won’t be moved when space is removed.
Deleting Blank Sheets from Problems
You can delete a sheet that does not contain any TI-Nspire™ applications or PublishView™ objects from a problem. To delete a blank sheet from a problem:
| 1. | Delete any TI-Nspire™ applications, PublishView™ objects, move or delete any problem breaks from the sheet. |
| 2. | Place your cursor inside the sheet you want to delete. |
| 3. | Right-click inside the blank sheet to open the context menu. |
| 4. | Click Edit > Delete Sheet. |
The blank sheet is removed from the problem.
