Working with Images in the Software
When working in the TI-Nspire™ software, you can insert, copy, move and delete images.
Inserting Images
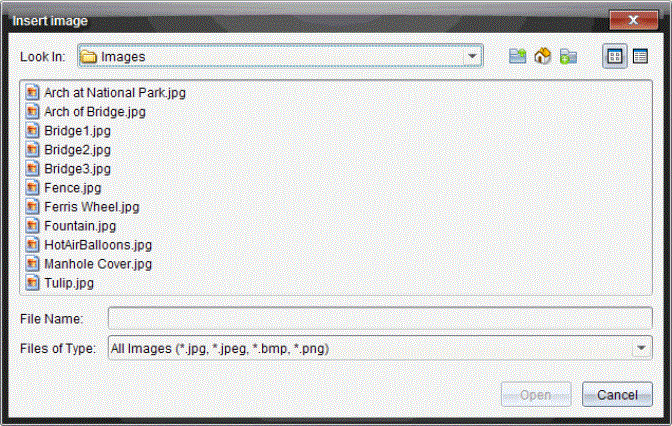
In the Notes and Question applications, and in Quick Poll, you can insert more than one image on a page. You can only insert one image on a page in the Graphs & Geometry and Data & Statistics applications.
|
1.
|
Open the document where you want to add an image. |
The Insert Image dialogue box opens.

|
3.
|
Navigate to the folder where the image is located and select the image. |
|
•
|
In the Graphs & Geometry and Data & Statistics applications, the image is inserted in the background behind the axis. |
|
•
|
In Notes, Question and Quick Poll, the image is inserted at the cursor location. You can type text above or below the image, and you can move the image up or down on the page. |
Note: You can also insert images by copying an image to the Clipboard and pasting it into the application.
Moving Images
In applications such as Notes and Question where the image is set at the cursor location, you can reposition the image by moving the image to a new line or blank space, or by placing the image within a line of text. In the Graphs & Geometry and Data & Statistics applications, images can be moved to any position on the page.
|
•
|
In the Notes and Question applications, click the image to select it. |
|
•
|
In the Graphs & Geometry and Data & Statistics applications, right-click the image and then click . |
|
2.
|
Click the selected image and hold the mouse button. |
|
•
|
If an image is in the foreground, the cursor changes to  . . |
|
•
|
If an image is in the background, the cursor changes to  . . |
|
3.
|
Drag the image to the new location and release the mouse button to place the image. |
If an image is in the foreground, the cursor changes to  when you hover your mouse pointer over a location where there is a new line or space. Images in the background can be moved and placed anywhere on the page.
Resizing Images
To retain the aspect ratio of an image, resize by grabbing the image at one of the four corners.
|
•
|
In the Notes and Question applications, click the image to select it. |
|
•
|
In the Graphs & Geometry and Data & Statistics applications, right-click the image and then click . |
|
2.
|
Move the cursor to one of the corners of the image. |
The cursor changes to  (a four-sided directional arrow).
Note: If you drag the cursor to an edge of the image, the cursor changes to  (a two-sided directional arrow). If you drag an image from one of its edges to resize it, the image becomes distorted.
|
3.
|
Click the corner or edge of the image. |
The  tool is enabled.
|
4.
|
Drag in to make the image smaller or drag out to make the image larger. |
|
5.
|
Release the mouse when the image size is correct. |
Deleting Images
To delete an image from an open document, complete the following steps.
|
•
|
If an image is in the foreground, click the image to select it. |
|
•
|
If an image is in the background, right-click the image and then click . |
The image is removed.

 .
. .
. when you hover your mouse pointer over a location where there is a new line or space. Images in the background can be moved and placed anywhere on the page.
![]() (a four-sided directional arrow).
(a four-sided directional arrow). ![]() (a two-sided directional arrow). If you drag an image from one of its edges to resize it, the image becomes distorted.
(a two-sided directional arrow). If you drag an image from one of its edges to resize it, the image becomes distorted. tool is enabled.