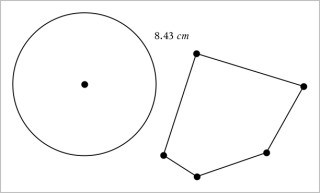
Measuring Objects
Measurement values update automatically as you manipulate the measured object.
Note: Measurements of objects created in the Graphs application are displayed in generic units named u. Measurements of objects created in the Geometry application are displayed in centimetres (cm).
| 1. | From the Measurement menu, select Length. (In the Graphs application, click Geometry > Measurement > Length.) |
| 2. | Click the object to display its length. |
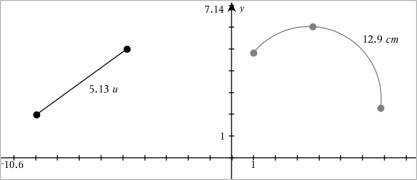
| 1. | From the Measurement menu, select Length. (In the Graphs application, click Geometry > Measurement > Length.) |
| 2. | Click the first point. |
| 3. | Click the second point or a point on the line or circle. |
|
|
| 1. | From the Measurement menu, select Length. (In the Graphs application, click Geometry > Measurement > Length.) |
| 2. | Click the object to display its circumference or perimeter. |
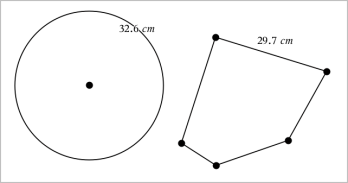
| 1. | From the Measurement menu, select Length. (In the Graphs application, click Geometry > Measurement > Length.) |
| 2. | Click two points on the object that form the side you want to measure. |
Note: You must click two points to measure a side. Clicking the side measures the entire length of the object's perimeter.
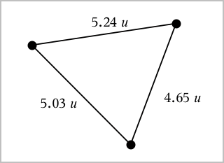
Note: You cannot measure the area of a polygon constructed using the Segment tool.
| 1. | From the Measurement menu, select Area. (In the Graphs application, click Geometry > Measurement > Area.) |
| 2. | Click the object to display its area. |
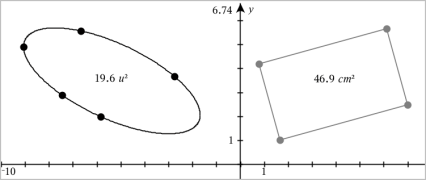
| 1. | From the Measurement menu, select Slope. (In the Graphs application, click Geometry > Measurement > Slope.) |
| 2. | Click the object to display its slope. |
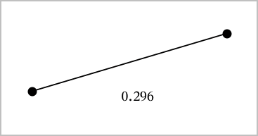
The value is updated automatically when you manipulate the object.
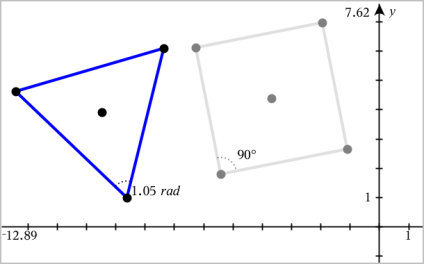
Measured angles in the Geometry application range from 0° to 180°. Measured angles in the Graphs application range from 0 radians to π radians. To change the angle unit, use the Settings menu.
| 1. | From the Measurement menu, select Angle. (In the Graphs application, click Geometry > Measurement > Angle.) |
| 2. | Click three locations or points to define the angle. The second click defines the vertex. |
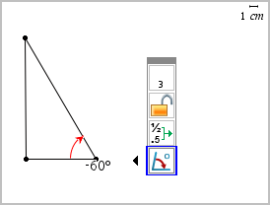
| 1. | From the Measurement menu, select Directed Angle. (In the Graphs application, click Geometry > Measurement > Directed Angle.) |
| 2. | Click three locations or existing points to define the angle. The second click defines the vertex. |
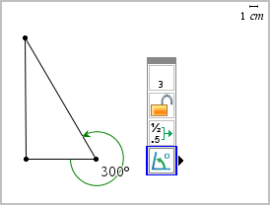
| 3. | To reverse the measurement orientation, |
| a) | On the Actions menu, select Attributes. |
| b) | Click the angle text. For example, click 300°. |
| c) | Select the orientation attribute, and use the right or left arrow key to change it. |
| d) | Press Esc to close the Attributes tool. |
| ▶ | Drag the measurement to the desired location. |
Note: If you move a measurement too far from its object, it stops following the object. However, its value continues to be updated as you manipulate the object.
You can set the length of a side of a Triangle, Rectangle or Polygon by editing its measured value.
| ▶ | Double-click the measurement, and then enter the new value. |
Use this method to create a variable and assign a measured value to it.
| 1. | Display the item's context menu, and select Store. |
| 2. | Type a variable name for the stored measurement. |
Use this method to assign a measured length value to an existing variable.
| 1. | Display the measurement's context menu, and select Variables > Link to. |
The menu shows the list of currently defined variables.
| 2. | Click the name of the variable you want to link to. |
| ▶ | Display the measurement's context menu, and select Delete. |
| 1. | Display the measurement's context menu, and select Attributes. |
| 2. | Use the up/down arrow keys to highlight the Lock attribute. |
| 3. | Use the left/right arrow keys to close or open the lock. |
As long as the value remains locked, manipulations are not allowed that would require the measurement to change.
 Measuring Length of a Segment, Circle Arc or Vector