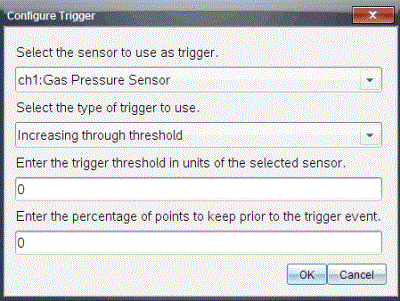
To start data collection based on a specific sensor reading, the TI-Nspire™ Lab Cradle and sensor must be connected.
| 1. | Connect the sensor. |
| 2. | Click Experiment > Advanced Set up > Triggering > Set Up. |
The Configure Trigger dialogue box opens.

| 3. | Select the sensor from the Select the sensor to use as trigger drop-down list. |
Note: The menu displays the sensors connected to the TI-Nspire™ Lab Cradle.
| 4. | Select one of the following from the Select the type of trigger to use drop-down list. |
| • | Increasing through threshold. Use to trigger on increasing values. |
| • | Decreasing through threshold. Use to trigger on decreasing values. |
| 5. | Type the appropriate value in the Enter the trigger threshold in units of the selected sensor field. |
When entering the trigger value, enter a value within the range of the sensor.
If you change the unit type after setting the threshold, the value automatically updates.
For example, if you use the Vernier Gas Pressure sensor with the units set as atm and you later change the units to kPa, the settings are updated.
| 6. | Type the number of data points to keep before the trigger value occurs. |
| 7. | Click OK. |
The trigger is now set and enabled if values were entered.
| 8. | (Optional) Select Experiment > Advanced Set up > Triggering to verify the active indicator is set to Enabled. |

Important: When the trigger is enabled, it stays active until it is disabled or you start a new experiment.
Enabling a Disabled Trigger
If you set the trigger values in the current experiment, and then disable them, you can enable the triggers again.
To enable a trigger:
| ▶ | Click Experiment > Advanced Set Up > Triggering > Enable. |
Disabling an Enabled Trigger
To disable the active trigger.
| ▶ | Click Experiment > Advanced Set Up > Triggering > Disable. |