TI-Nspire™ Premium Teacher Software lets you change settings on connected handhelds from your computer. The handhelds can be connected through wired or wireless connections.
You don't need to start a class session or require students to log in. You can perform these operations while other transfer activities, such as Quick Poll or Live Presenter, are in progress.
This removes all Scratchpad data from the connected handhelds, including the Scratchpad Calculator pages and Graphs & Geometry pages, the Scratchpad history and variables, and the contents of each handheld's clipboard. The handhelds can be in or out of Press-to-Test mode.
WARNING: This action clears the Scratchpad and Clipboard data from all currently connected handhelds. You cannot limit it to a selected set of handhelds.
| 1. | From the Tools menu, select Prepare Handhelds > Clear Scratchpad. |
A Clear Scratchpad confirmation message appears.
| 2. | To proceed, click Clear Scratchpad. |
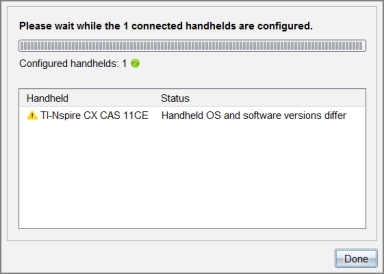
A status log reports the progress. A notification message appears on each handheld.
This lets you apply document settings, such as Angle unit and Calculation Mode, to the connected handhelds. It gives you a quick way to put all the handhelds into a known state. You can choose to save configurations for reuse. The handhelds can be in or out of Press-to-Test mode.
Note: The document settings are applied immediately to handheld Scratchpads and are saved as defaults for the Scratchpad and all new documents. Existing documents, whether open or closed, retain their prior settings.
| 1. | From the Tools menu, select Prepare Handhelds > Set Default Document Settings. |
The Document Settings dialogue box opens, showing the setting that will be applied.
| 2. | Click each option that you want to change, and select the desired setting. |
| - | To apply a previously saved configuration, click the Saved Configuration list, and select the configuration. |
| - | To restore factory default settings, click the Saved Configuration list, and select TI Factory Default. |
| 3. | (Optional) To save the current settings as a named configuration, click Save, type a Name into the Save Configuration dialogue box, and click Save. |
| 4. | Click Send. |
A notification message appears on each handheld, and a status log reports errors and warnings to the teacher. Click Done to close the log.

This lets you start a Press-to-Test session on the connected handhelds and apply the same set of restrictions to each by choosing them from a dialogue and optionally saving the configurations for reuse. Or you can enter a Test Code that contains a pre-defined set of restrictions.
WARNING: All currently connected handhelds will restart, including any handhelds that are already in a Press-to-Test session. You cannot limit this action to a selected set of handhelds.
Choosing Test Mode Restrictions
| 1. | From the Tools menu select Prepare Handhelds > Send Press-to-Test > Choose Test Mode Restrictions. |
The Press-to-Test Configuration dialogue box opens, showing the restrictions that will be applied.
| 2. | Click the tick box for each restriction to select or deselect it. |
In the Test Code section, the code will automatically update based on your selections.
| 3. | (Optional) To save the current settings as a named configuration, click Save, type a Name into the Save Configuration dialogue box, and click Save. |
| 4. | Click Send Press-to-Test. |
A warning message lists the effects of entering a Press-to-Test session.
| 5. | To proceed, click Enter Press-to-Test. |
Entering a Test Code
To enter a test code, you can use one provided to you, or one generated using the above method.
| 1. | From the Tools menu select Prepare Handhelds > Send Press-to-Test > Enter Test Code. |
The Press-to-Test Configuration dialogue box opens showing the most recent test code, or blanks if it is your first-ever session.
| 2. | Enter a test code in the numeric boxes. |
The test code will be validated as you enter each of the eight numbers and will display a message accordingly. You will not be able to start Press-to-Test without a valid test code.
| 3. | (Optional) To save the current test code as a named configuration, click Save, type a Name into the Save Configuration dialogue box, and click Save. |
| 4. | Click Next. |
The Press-to-Test Configuration dialogue box opens showing the valid test code, the angle setting, CAS mode, and a list of the restrictions.
| 5. | Click Send Press-to-Test. |
Each handheld preserves its current files and settings and then restarts in Press-to-Test mode. A status log reports errors and warnings to the teacher. Click Done to close the log.

This closes the Press-to-Test session on the connected handhelds and restarts them.
WARNING: All currently connected handhelds will exit Press-to-Test and restart. All data and files created while in Press-to-Test will be deleted. You cannot limit this action to a selected set of handhelds.
| 1. | Notify the students that you are about to close the Press-to-Test session on their handhelds. |
| 2. | From the Tools menu, select Prepare Handhelds > Exit Press-to-Test. |
A warning message lists the effects of exiting a Press-to-Test session.
| 3. | To proceed, click Exit Press-to-Test. |
A status log reports the progress. Each handheld restarts with its previous files and settings restored.
 Clearing the Scratchpad