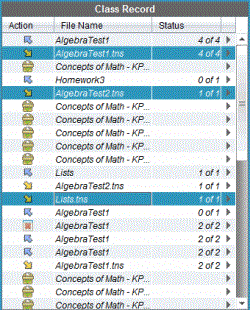
You can collect any previously sent files located in student class folders by using the Class Record. You can also collect new files from students by typing the full file name.
When you collect files from the menu or icon, you have the option of deleting the collected files from student class folders.
Note: If a student deleted a file, renamed a file, or stored it in another location, the file cannot be collected.
To collect files, class must be in session. If any students are not logged in, files you collect are automatically transferred when they log in.
| 1. | From the Class Record, choose the file or files that have been sent to class. |
Note: By default, the first 100 records are listed. To display additional records, click Load Next 100 or click Load All Entries.

| 2. | Click ¢ next to any of the highlighted files and choose Collect Selected from Class. |
The file transfer appears in the Class Record.
| 1. | Click Tools > Collect from Class or click  . . |
The Select file(s) to collect dialogue box opens.
| 2. | To choose the files or folders you want to collect, do one of the following: |
| • | Click Recent Files and navigate to the file you want to collect and click it. To select multiple files or folders, press and hold the Ctrl key (Mac®: “) while clicking each file name. |
| • | Click Enter Filename and type the name of the file in the File name box, and then click Add. |
| 3. | Click Next. |
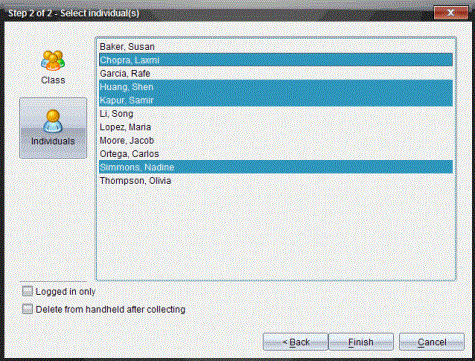
The Select individual(s) dialogue box opens.

| 4. | Select the student(s) from whom you want to collect the file: |
| • | To collect the file from the whole class, click Class  . To collect the file only from class members who are currently logged in, select the Logged in only check box. . To collect the file only from class members who are currently logged in, select the Logged in only check box. |
| • | To collect the file from an individual student, click Individuals  , and then click the student. , and then click the student. |
Note: If you had any students selected in the classroom area, the software already has them selected.
| 5. | If you want to remove the file from student class folders after you have collected it, select the checkbox next to the option to delete the file after it has been collected. |
| 6. | Click Finish. |
The collected file appears in the Class Record.
The Collect Missing function becomes active for files that have not been received from students.
| 1. | From the Class Record, select the collect action of file that was sent to class. |
| 2. | Click File > Collect Missing. |
Note: The collection action cannot be active.
 Collecting Files from the Class Record