Managing Files in a Lesson Bundle
You can open, copy/paste, delete, and rename files in an existing lesson bundle. To locate and work with files in an existing lesson bundle:
|
1.
|
Choose one of the following options to locate an existing lesson bundle. |
|
•
|
When working in the Documents Workspace, open the Content Explorer (click  in the Documents Toolbox), and then navigate to the folder where the lesson bundle is located. in the Documents Toolbox), and then navigate to the folder where the lesson bundle is located. |
|
•
|
When working in the Content Workspace, navigate to the folder where the lesson bundle is located in Content pane. |
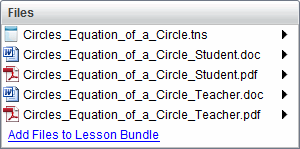
Note: When you click a lesson bundle name in the Content pane, the Files dialog box opens in the Preview pane. Select a file and right-click to open the context menu.
|
2.
|
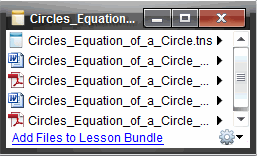
Double-click the lesson bundle name to open the Lesson Bundle dialog box. |
|
3.
|
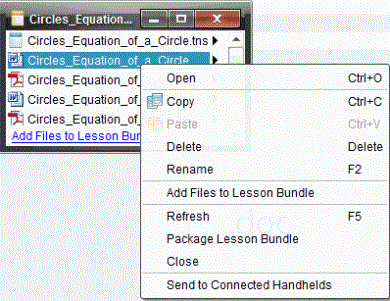
Select the file you want to work with and click ¢ to open the context menu. |
|
4.
|
Click the action you want to perform: |
|
•
|
Click . TI-Nspire™ and PublishView™ documents open in the Documents Workspace. When you open another file type, it launches the application or program associated with that file. |
|
•
|
Click to place the file in the Clipboard. |
|
•
|
Navigate to a folder on your computer or select a connected handheld or laptop, and then right-click and click to place the copied file in a new location. |
|
•
|
Click to delete a file from the lesson bundle. Use caution when deleting a file from a lesson bundle. You should ensure files contained in the bundle are backed up if you need the files for future use. |
|
•
|
Click to give the file a new name. To cancel this action, press . |
|
•
|
Click to select and add files to the bundle. |
|
•
|
Click to update the list of files in the bundle. |
|
•
|
Click to create a .tilb file |
|
•
|
Click to open the Transfer Tool and send the selected file to connected handhelds. You can send .tns files and OS files. |
|
5.
|
When finished, click to close the dialog box. |