Both the TI-Nspire™ Docking Station and the TI-Nspire™ CX Docking Station are designed to be easy to use and easy to move when needed in a different classroom. Once all components are unpacked, the docking station can be set up for use in minutes.
The TI-Nspire™ Docking Station has 10 slots and each slot can accommodate either a TI-Nspire™ CX Handheld or a TI-Nspire™ handheld. You can also seat a TI-Nspire™ handheld with a slide case on the front of the handheld in the TI-Nspire™ Docking Station.
The TI-Nspire™ CX Docking Station also has 10 slots; however, this docking station was designed specifically for the TI-Nspire™ CX Handheld. You cannot seat TI-Nspire™ handhelds in the CX docking station.
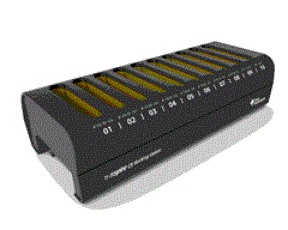
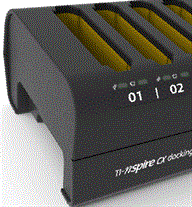
The LED indicators on the front of the docking station provide information about the battery status, transfer status, and indicate whether the handheld is properly seated.
|
Ÿ |
Transfer Status LED Indicator |
|
|
|
Battery Status LED Indicator |

Indentations on each side of the docking station enable you to lift a docking station using both hands.
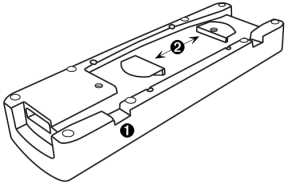
Turn the docking station over and you will notice an indentation or “channel” across the bottom. To ensure the docking station sits flat on a surface, thread the cable through this space. You can use the cable wrapper to manage excess USB cable when you don’t need to use the entire length.
|
|
|

|
Use channel to thread cable. |

|
Use cable wrapper to manage excess cable. |