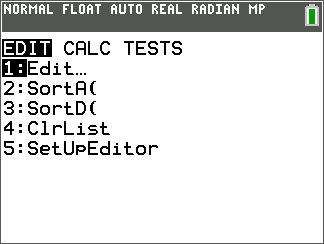
You can find statistics commands in the … menu. You can create lists of data, then plot or analyze that data using the statistics commands.
You can use the following statistics functions:
|
Description |
Keys |
|---|---|
|
Best fit equations (regressions) |
… ~ } † |
|
Define and store up to three stat plot definitions |
y , |
|
Distributions |
y = |
|
List-based statistical analysis |
y 9 ~ ~ |
|
Logistic and sine regression analysis |
… ~ } † |
|
One- and two-variable analysis |
… ~ À and … ~ Á |
|
Statistical tests |
… ~ ~ |
You can perform 16 hypothesis tests and confidence intervals and 15 distribution functions. You can display hypothesis test results graphically or numerically.
To enter lists of data:
| 1. | Press …. |
| 2. | Select 1: Edit in the EDIT submenu, then [enter]. |
| 3. | Enter your data into list columns. |
Note: Once in the list editor, use the arrow keys to enter the data in the lists. L1 – L6 are built-in list names. Custom list names can be created by scrolling to a blank list name and pressing [enter].
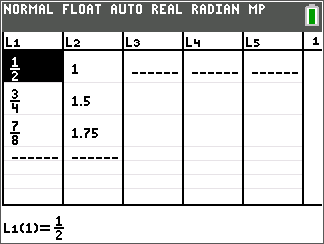
To plot this data:
| 4. | Press y ,. |
| 5. | Press 1: Plot1 (to set up a scatter plot for L1 and L2), then [enter]. |
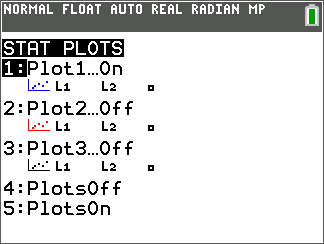
| 6. | Press | to highlight On. |
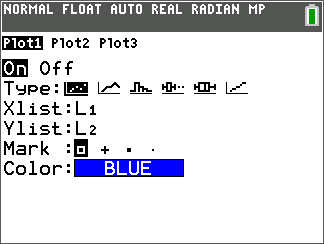
| 7. | Press q to automatically set up a graphing window for your data. |
| 8. | Press 9: ZoomStat to see the graph. |
| 9. | Press r and arrow keys to trace on the plot. |
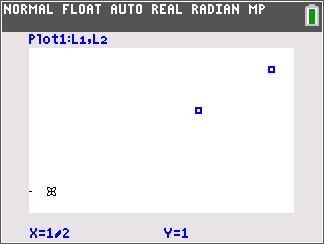
You can plot your statistics data in these ways:
| • | Scatter plot |
| • | xyLine |
| • | Histogram |
| • | Regular or Modified box-and-whisker plot |
| • | Normal probability plot |
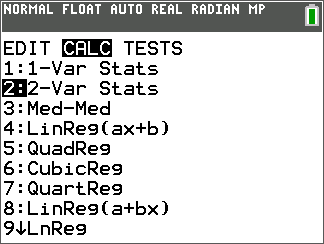
To find the two variable statistics for L1 and L2:
| 1. | Press …. |
| 2. | Press ~ to highlight CALC. |
| 3. | Press † until you highlight 2:2-Var Stats, then [enter]. |
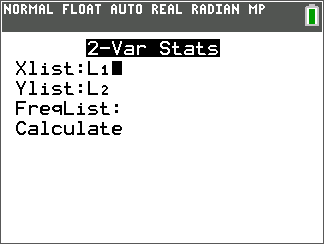
| 4. | Press † until you highlight Calculate, then [enter]. |
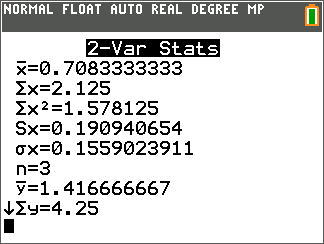
| ▶ | The screen will display the variable statistics. |
Note: Most common probability and statistics commands will have a wizard to prompt for syntax (values). The built-in Catalog Help is also available by pressing the à key on most menu items. This opens an editor to help you fill in the syntax (values) needed in a calculation.