Connecting TI-Innovator™ Rover
There are two sets of connection steps to use the TI-Innovator™ Rover.
|
•
|
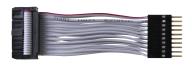
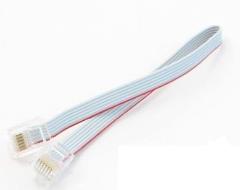
First, connect the Rover to the TI-Innovator™ Hub, using the two ribbon cables provided. |
|
•
|
Second, connect the Hub to a graphing calculator, using the USB Unit‑to‑Unit (Mini‑A to Mini‑B) cable included with the Hub. |
Connecting TI-Innovator™ Rover to TI-Innovator™ Hub
|
1.
|
Insert the Breadboard Ribbon Cable into the on the Hub. |
Note: It is critical that you insert the cable correctly. Make sure the red (dark) wire pin is inserted into the 5v hole on the Hub's Breadboard Connector.

|
2.
|
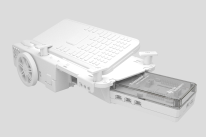
Carefully guide the attached Ribbon Cable through the opening at the back of the Rover. |
|
3.
|
As the cable comes through, slide the Hub into place using the Guide Rails. |
You will hear a click when the Hub is properly inserted.
|
4.
|
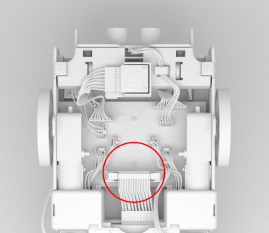
Open the two latches on the Rover Circuit Board Ribbon Cable Connector. |
|
5.
|
Align the notch in the ribbon cable with the slot on circuit board connector. |
|
6.
|
Insert the ribbon cable and close the latches. |
|
7.
|
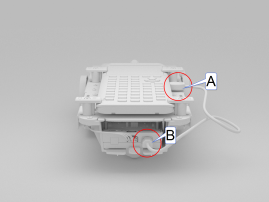
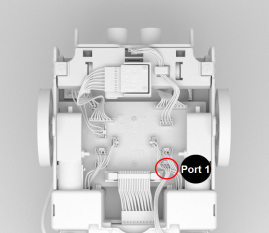
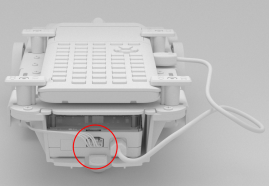
Insert one end of the into the Rover circuit board. |
Note: There are two possible . Use Port 1.
|
8.
|
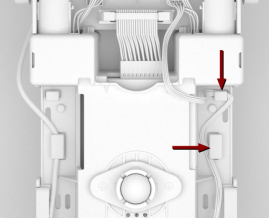
Insert the slack I2C Cable into the side rails. |
|
9.
|
Align the tab on the I2C Cable with the top of the I2C port. |
|
10.
|
Insert the free end of the connector into the at the back of the Hub. |
Connecting TI-Innovator™ Hub to a Graphing Calculator
|
1.
|
Turn the Rover right side up. |
|
2.
|
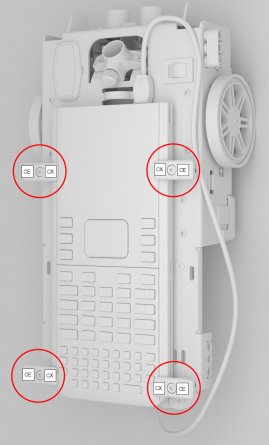
Lift and turn the Calculator Holder Pegs so that they are parallel with the side of the Rover. |
|
3.
|
Place the TI CE Graphing Calculator or TI-Nspire™ CX Handheld on the platform with the screen toward the Marker Holder. |
|
4.
|
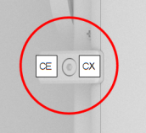
Turn the pegs so that the CE or CX Label is positioned inward to match the graphing calculator. |
The pegs will snap into place when they are positioned correctly.
Caution: Do not turn the Calculator Holder Pegs without lifting them first. They could break.
|
5.
|
Identify the "" connector on the USB Unit‑to‑Unit (Mini‑A to Mini‑B) cable. Each end of this cable is embossed with a letter. |
|
6.
|
Insert the "" connector into the port on the Hub. |
|
7.
|
Insert the free end of the cable (the "" connector) into the USB port on the graphing calculator. |