About Vernier Go Direct® Sensors
The Vernier DataQuest™ application now supports Vernier Go Direct® sensors for your experiments. This can be done via direct connect over USB or over Bluetooth using the TI Bluetooth® Adapter (with Sketch v1.1.1 and later).
You can connect up to four Go Direct sensors over Bluetooth and up to four channels for multi-channel sensors.
Note: This functionality is available on the handheld only at this time, but tns documents saved on the handheld will work in the desktop software.
Supported Sensors
|
•
|
Go Direct® 3-Axis Magnetic Field Sensor (GDX-3MG) |
|
•
|
Go Direct® Colorimeter (GDX-COL) |
|
•
|
Go Direct® Conductivity Probe (GDX-CON) |
|
•
|
Go Direct® Current Probe (GDX-CUR) |
|
•
|
Go Direct® Force and Acceleration Sensor (GDX-FOR) |
|
•
|
Go Direct® Gas Pressure Sensor (GDX-GP) |
|
•
|
Go Direct® Hand Dynamometer (GDX-HD) |
|
•
|
Go Direct® Light and Color Sensor (GDX-LC) |
|
•
|
Go Direct® Motion Detector (GDX-MD) |
|
•
|
Go Direct® pH Sensor (GDX-PH) |
|
•
|
Go Direct® Temperature Probe (GDX-TMP) |
|
•
|
Go Direct® Voltage Probe (GDX-VOLT) |
More sensors will be supported in the future.
Connecting via USB
Connecting a Go Direct sensor via USB automatically launches the Vernier DataQuest™ application with no additional setup.
Note: It is recommended to use the mini-A to micro-B cable from Vernier Science Education to connect the Go Direct sensor to the calculator.
Connecting via Bluetooth
|
1.
|
Attach the TI Bluetooth® Adapter to the handheld. |
Make sure the green power light is on and the sensor is fully charged.
|
2.
|
Press the On/Power button on the sensor. |
Make sure the Bluetooth light is blinking red (waiting to connect). If too much time elapses, the light will stop blinking and you will not be able to connect. If so, press the On/Power button again.
|
3.
|
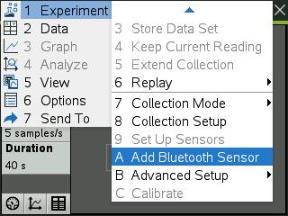
Press c, and select  . . |
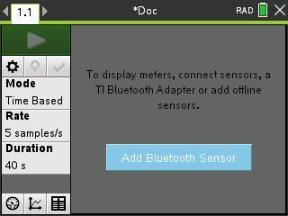
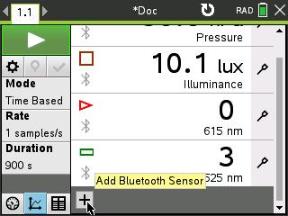
A Bluetooth sensor can also be added through the menu, or by clicking the  icon in the DataQuest™ app main view.
On the Sensors dialog under Discovered Bluetooth Devices, you should see your device. All Vernier Bluetooth devices will be shown with their Order Code and ID.
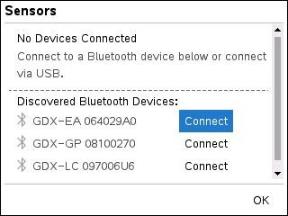
If you do not see your sensor, make sure the sensor is powered on and close to the TI Bluetooth® Adapter. Click to close the dialog and repeat this step.
|
5.
|
Click next to the sensor you want to use. |
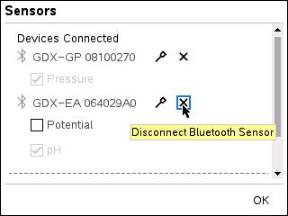
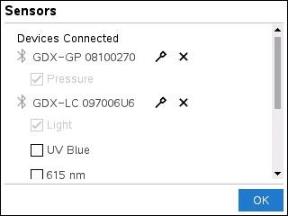
Once connected, the Sensors dialog will show options specific to that sensor. you can also get device information, add or remove channels (for multi-channel sensors), or disconnect the device.
|
6.
|
Select or deselect the options as needed and click . |
Repeat steps 4 through 6 to add another sensor for your experiment.
|
7.
|
Start collecting data with each connected sensor. |
Disconnecting a Sensor
|
1.
|
Click the button or use the menu item. |
|
2.
|
Click the  icon to the right of the device ID. icon to the right of the device ID. |