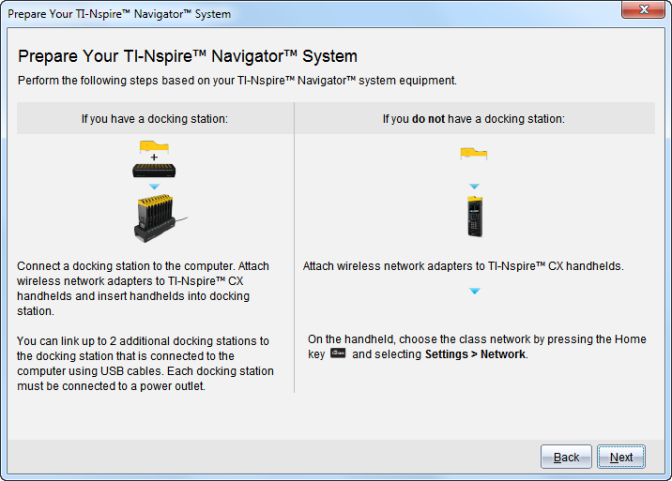
After you assign a name to your class network and the access points are configured, you must associate your wireless clients with the network. How you complete this process depends on whether you have docking stations that enable you to work with multiple handhelds and wireless clients at one time.
| • | If you have a docking station, attach the adapters to the handhelds, and then insert the handhelds into a docking station that is connected to your computer. |
| • | If you do not have a docking station, attach the wireless adapters to the handhelds. |
| 1. | Follow the on-screen instructions to connect the handhelds to their wireless adapters and/or docking stations, and then click Next. |
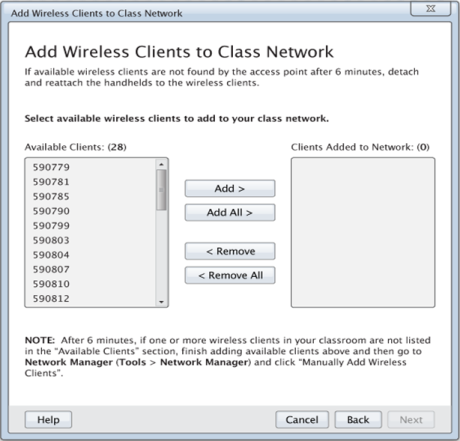
The Add Wireless Clients to Class Network dialog box opens.
The access point finds the available clients and lists them in the Available Clients box. It can take up to six minutes for the access point to find all available clients. Check the number of available clients to ensure all clients are listed.
| 2. | Follow steps a, b, and c on all TI-Nspire™ handhelds that are not inserted into a docking station. |
| a) | Turn on each handheld. |
| b) | From the Home screen of the handheld, select Settings > Network. The handheld lists the available networks that are within range. |
| c) | Select the name that you assigned to your class network, and click Connect. |
| 3. | On the Add Wireless Clients to Class Network screen, select the wireless clients you want to add. |
| • | To add all available clients listed, click Add All. |
| • | To add specific clients, select one client ID at a time, and then click Add. |
Important! Clients are not part of the class network until you complete this step to add them.
| 4. | Click Next to associate the wireless clients with the classroom network. |
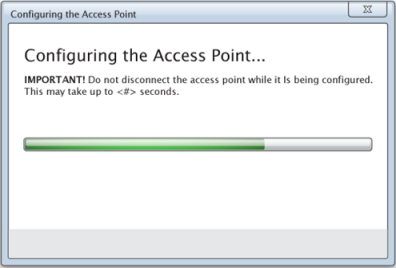
The software associates the attached wireless clients with the classroom network. When the process is complete, the Setup Complete dialog opens.
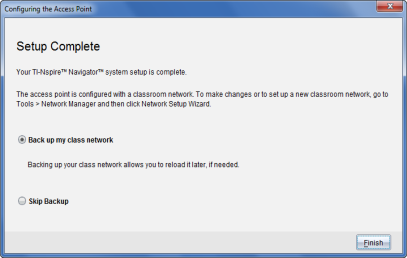
| 5. | Select Back up my class network to save a copy of your classroom network configuration. |
The saved network information includes the list of wireless client IDs, the network name, and the channel and country selected on the access point.
Saving a network enables you to reload the configuration at a later time using the Network Manager. By default, the file is saved in the My Documents/TI-Nspire/Navigator Network folder.
To finish without saving a backup copy, select Skip backup.
| 6. | Click Finish to complete the setup. |
Note: You can add more wireless adapters to the class network at a later time using the Network Manager.