| 1. | Turn the calculator OFF. |
| 2. | Press and hold down the ~, | and É keys, and then release. |
| 3. | The RESET OPTIONS screen displays. |
| 4. | To change the default settings, move the cursor over the desired setting and press [enter]. |
By default:
| • | ANGLE is set to DEGREE |
| • | STAT DIAGNOSTICS is set to ON |
| • | DISABLE logBASE and DISABLE S( are set to YES |
| • | DISABLE Numeric Solver is set to NO |
| 5. | Press OK to first validate any loaded TI Apps and then set up the exam mode. When validation and test mode setup is complete, the confirmation screen will display. |
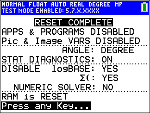
| 6. | Press any key to place the calculator in test mode. |
Note:
| • | The status bar is blue when in TEST MODE and TEST MODE ENABLED. |
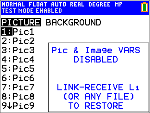
| • | Pic & Image Vars are disabled. |
| • | All variables stored in RAM and in archived memory are deleted. |
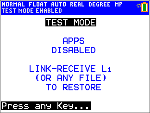
| 7. | On the exam calculator, press Πto verify that applications are disabled. The following screen displays: |
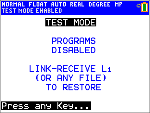
| 8. | On the exam calculator, press ¼ to verify that programs have been disabled. The following screen displays: |
| 9. | On the exam calculator, Pic and Image Vars are shown as disabled. The following screen displays: |
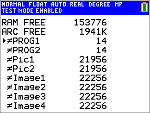
| 10. | In memory management (y L, 2:Mem Management/Delete...), disabled files will display with the not equal sign. |
