In this lesson you will reset the TI-83 Plus or TI-83 to its factory default settings. Note that the Reset Defaults command restores all system variables and modes to their original factory setting. It does not erase stored programs or user-defined variables.
Before beginning the course, you should reset the calculator to ensure that the keystrokes in the directions will produce the illustrated results.
- Make sure your calculator is on and the contrast is set.
-
Display the MEMORY menu by pressing
 [MEM].
- Reset the defaults:
[MEM] is located above the
![]() key. Remember that boxes represent the actual keys, and when a command is written within brackets, look for the command in yellow or green above a key on the keyboard.
key. Remember that boxes represent the actual keys, and when a command is written within brackets, look for the command in yellow or green above a key on the keyboard.
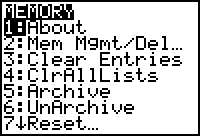
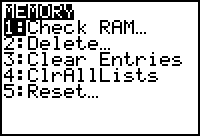
You should see the one of following screens depending on which calculator you are using:
|
|
| TI-83 Plus Display | TI-83 Display |
If you are using the TI-83 Plus, select 7:Reset.
If you are using the TI-83, select 5:Reset.
|
|||
|
|
|||
Once you select Reset, one of the following screens will appear. The displays shown below are different because of the memory differences in the calculators.

|

|
| TI-83 Plus Display | TI-83 Display |
-
Select 2:Defaults by pressing
 or by using the down arrow to highlight 2:Defaults and then pressing
 .
.
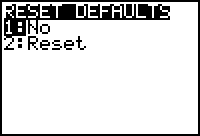
TI-83 or TI-83 Plus Display
The calculator gives you a chance to back out if you have changed your mind.
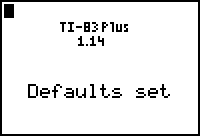
- Select 2:Reset to confirm that you want to reset the defaults.
|
|
| TI-83 Plus Display | TI-83 Display |
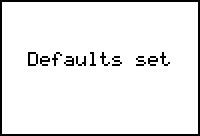
The calculator confirms that the defaults have been reset. The second line of the TI-83 Plus display shows your current operating system version number, and it may be different than the display above.
|
|||
|
|
|||
Default Settings
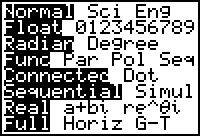
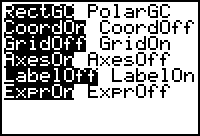
Some of the settings are shown below in the MODE and FORMAT menus. Press the keys shown to see the screens illustrated. The highlighted selections are the factory defaults.
|
Press
|
Press
|
|
|
Return to the Home screen
-
Exit the setting screens and return to the Home screen by pressing
 [QUIT].
Deleting All Variables
Resetting defaults restores all system variables to factory settings without deleting variables and programs in RAM. If you want to delete all variables and programs, follow the directions below.
-
Display the MEMORY menu by pressing
 [MEM].
- Select [RESET].
- Select 1:ALL RAM... on the TI-83 Plus and 1:ALL MEMORY... on the TI-83.

|

|
| TI-83 Plus Display | TI-83 Display |
Resetting ALL RAM or ALL MEMORY will delete all data and programs. The elipses after RAM or MEMORY indicate that a submenu will appear, that asks you to confirm the request.
-
Select 1:No to exit without erasing all data and programs.
Select 2:Reset to erase all data and programs.
Using the Y= Editor
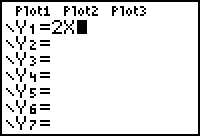
The Y= Editor is shown in the screen below. You access the Y= editor by pressing the
![]() key. For now it is important to know how resetting the factory defaults affects whether an equation or plot is turned on or off. In Module 1 you will learn how to enter and graph equations using the editor.
key. For now it is important to know how resetting the factory defaults affects whether an equation or plot is turned on or off. In Module 1 you will learn how to enter and graph equations using the editor.
|
|
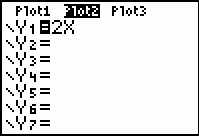
| Equations and plots are off | Y1 and Plot 2 turned on |
Switching Graphs On and Off
The function shown in the screen on the left above, Y1 = 2x, is turned off because the equals sign is not highlighted. You can turn the function on or off by moving the cursor over the equals sign using the left arrow key and pressing
![]() . When the equals sign is highlighted, as in the screen on the right above, the function is on and it can be displayed in the Graph window.
. When the equals sign is highlighted, as in the screen on the right above, the function is on and it can be displayed in the Graph window.
The plots are also turned off (not highlighted) in the screen on the left above. You can turn a plot on or off by moving the cursor to the Plot using the arrow keys and then pressing
![]() . Functions and Plots that are "off" are not graphed or included in tables.
. Functions and Plots that are "off" are not graphed or included in tables.
Resetting the defaults does not erase equations or plots, but it does turn them off. So after resetting the defaults, any functions or Plots you had in the calculator will still be there, but they won't appear in a graph or table until they are turned on again.